
How to mix a track in Suno Studio with all 7 audio effects
My stack My fav 6 tools for AI music after testing 70+
-
 ElevenMusic · Music generation
 -
 Moises · Stem separation
 -
 Controlla · Voice swap & cloning
 -
 Cryo Mix · Mixing + mastering
 -
 Neural Frames · Music videos
 -
 ONCE · Distribution
Some links are affiliate links — I earn a commission at no cost to you. Every tool here is one I run myself and truly believe in. This stack is proven.
Suno generates a finished-sounding song, and finished is the problem. The reverb is baked in, the vocal sits where the model put it, and your taste has nowhere to grab on.
Studio 2.0 hands you a mixing chain. This guide walks through all 7 Suno Studio effects, what each one does in plain terms, and how to automate any knob over time. You will leave knowing how to take a generation apart and mix it like a session you recorded yourself.
What you need before you mix in Suno Studio
The short list:
- A Suno Premier subscription ($24 a month, annual). Studio is Premier-only. My Suno Studio beginner’s guide covers the plans.
- A track in a Studio project. Generated in Suno, recorded, or imported.
- Headphones or monitors you trust. Laptop speakers lie about bass.
One expectation to set: Suno Studio is not compatible with VST or Audio Units plugins, per Suno’s effects guide. Your plugin folder stays in your DAW. The 7 built-in effects plus chat-built custom plugins are the whole toolbox.
Why mix inside Suno Studio instead of exporting to a DAW?
Because the stems and the model live in the same window. Split a generation, fix the guitar’s mud with EQ, then ask the chat bar for a new part when one stem is beyond saving. The loop from hearing a problem to regenerating the part never leaves the browser. Export-to-DAW still wins for surgical work, and dedicated tools cover mastering (my roundup of AI mixing and mastering tools compares them). For everything before that stage, Studio now holds its own.
Adam McFarland, who runs Suno’s mixing walkthrough, frames the goal well:
There's no right or wrong way to do it. It's about our ability to tailor make and uniquely create what sounds like us.
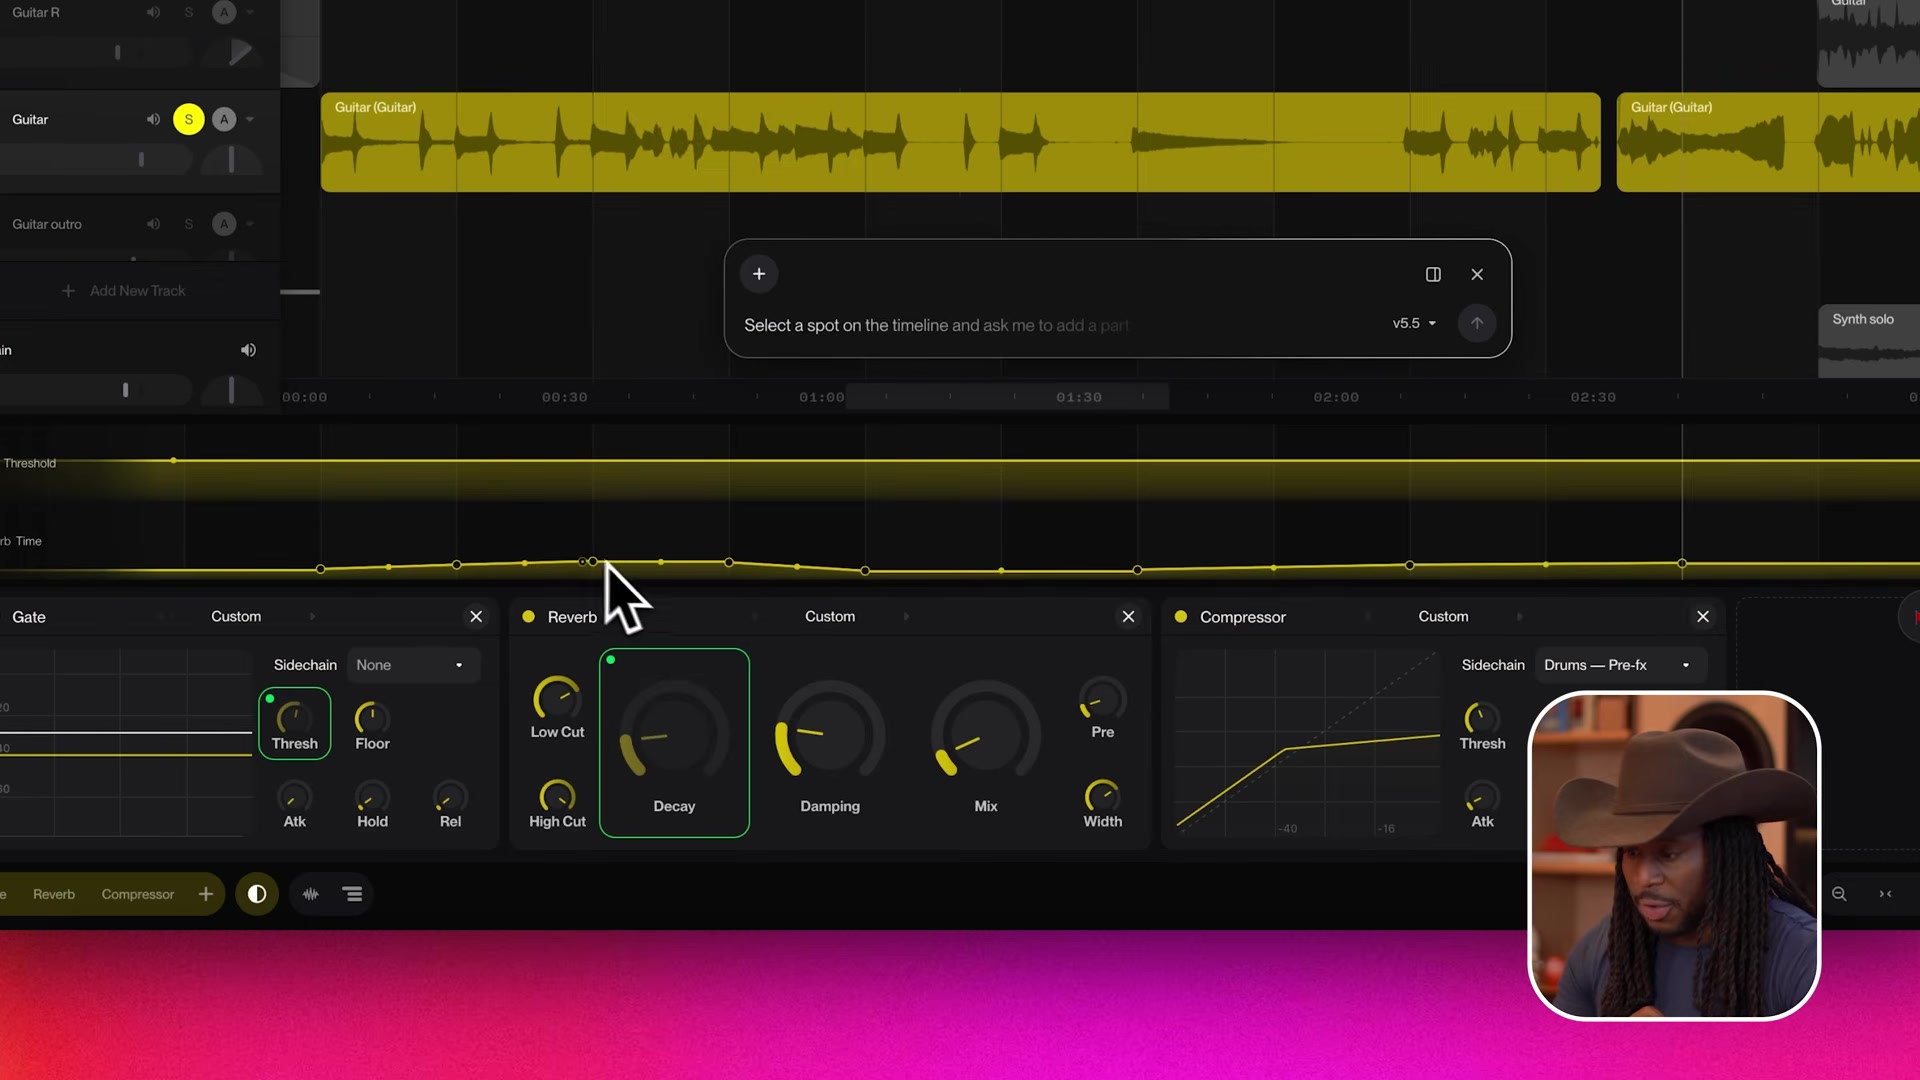
Here is what a finished chain looks like: a gate, reverb and compressor running on one track, with an automation curve drawn across the timeline above them.
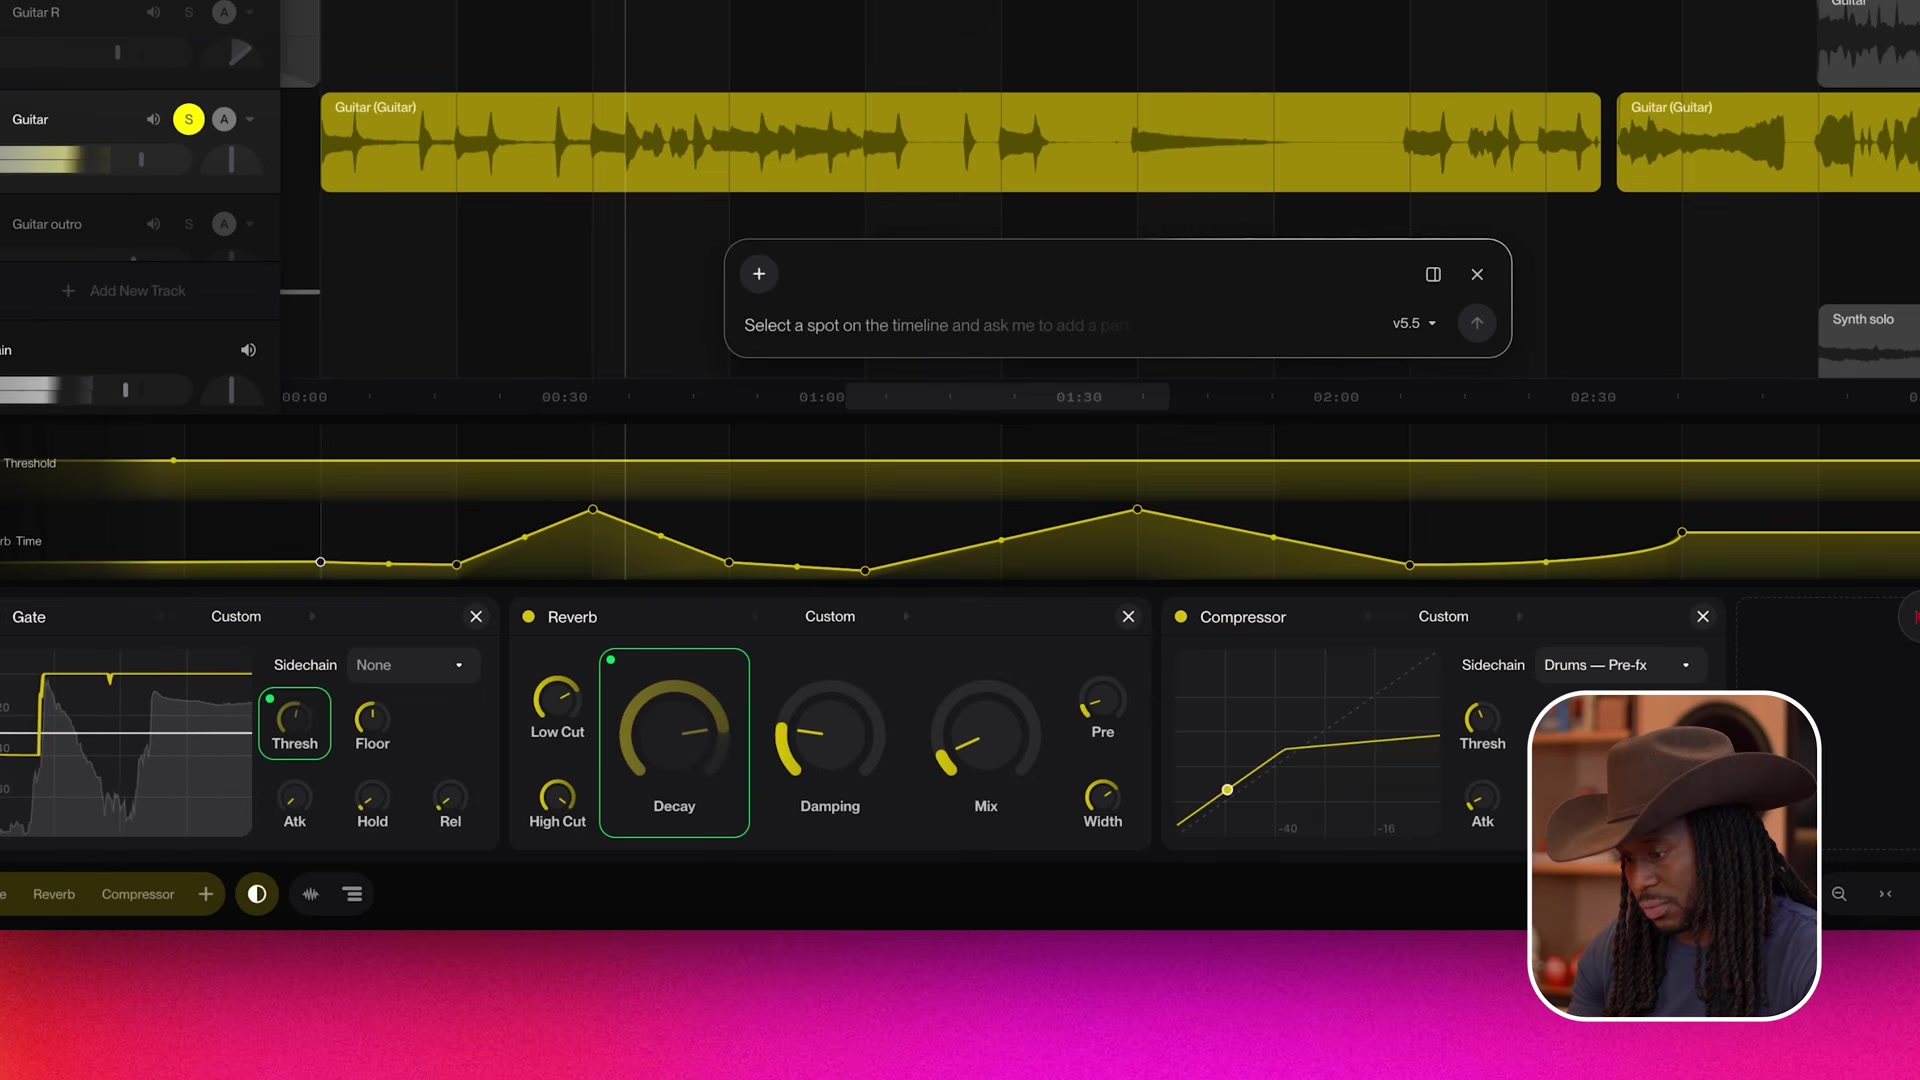
His full effects walkthrough is worth the 12 minutes:
How to mix a track in Suno Studio, step by step
Eleven steps, from one stereo file to a mixed multitrack.
Step 1: Split the track into stems
- Right-click the clip and choose Get Stems.
- Pick Advanced Split and type the instruments you want. Naming parts by ear returns higher-fidelity stems than auto-detection, per Suno’s own walkthrough.
- Click Insert All. The stems land on timing-aligned tracks below the original.
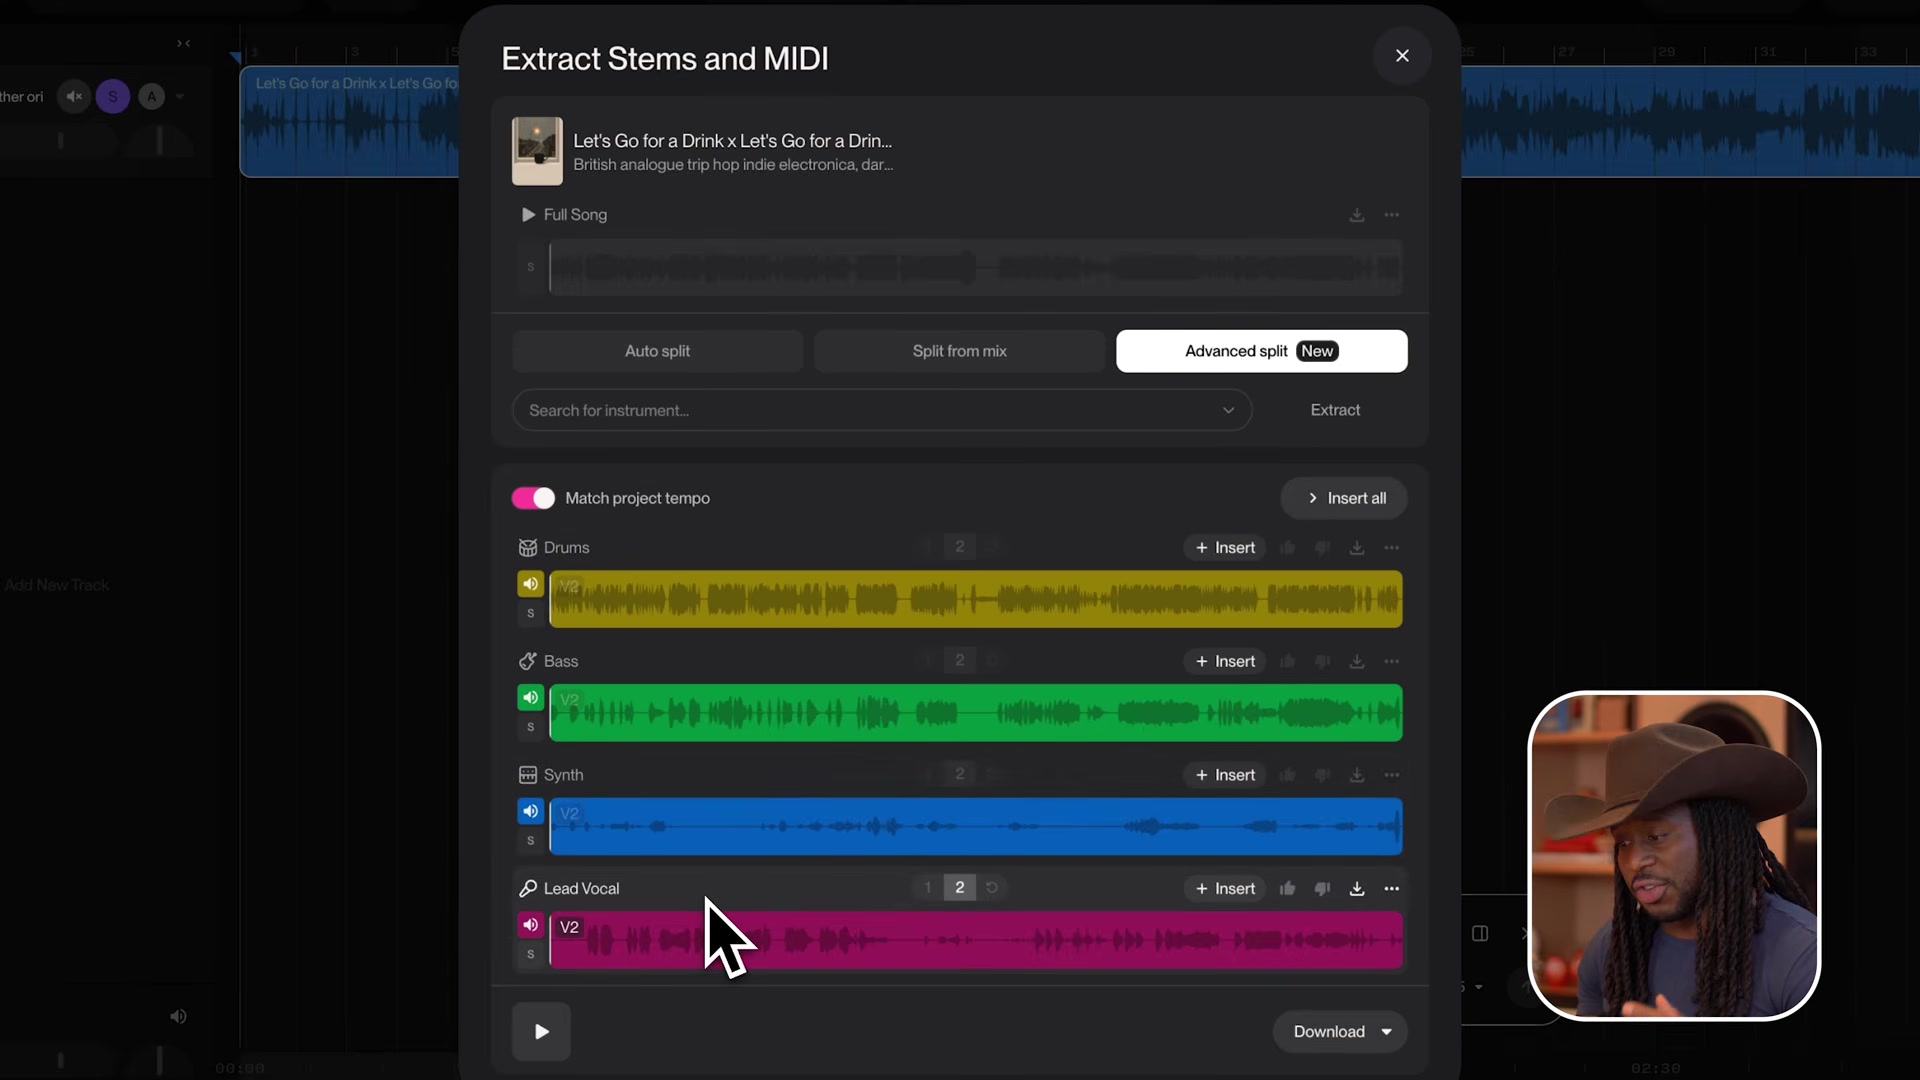
My Suno stem separation guide covers the 3 split modes in detail.
Step 2: Add your first effect
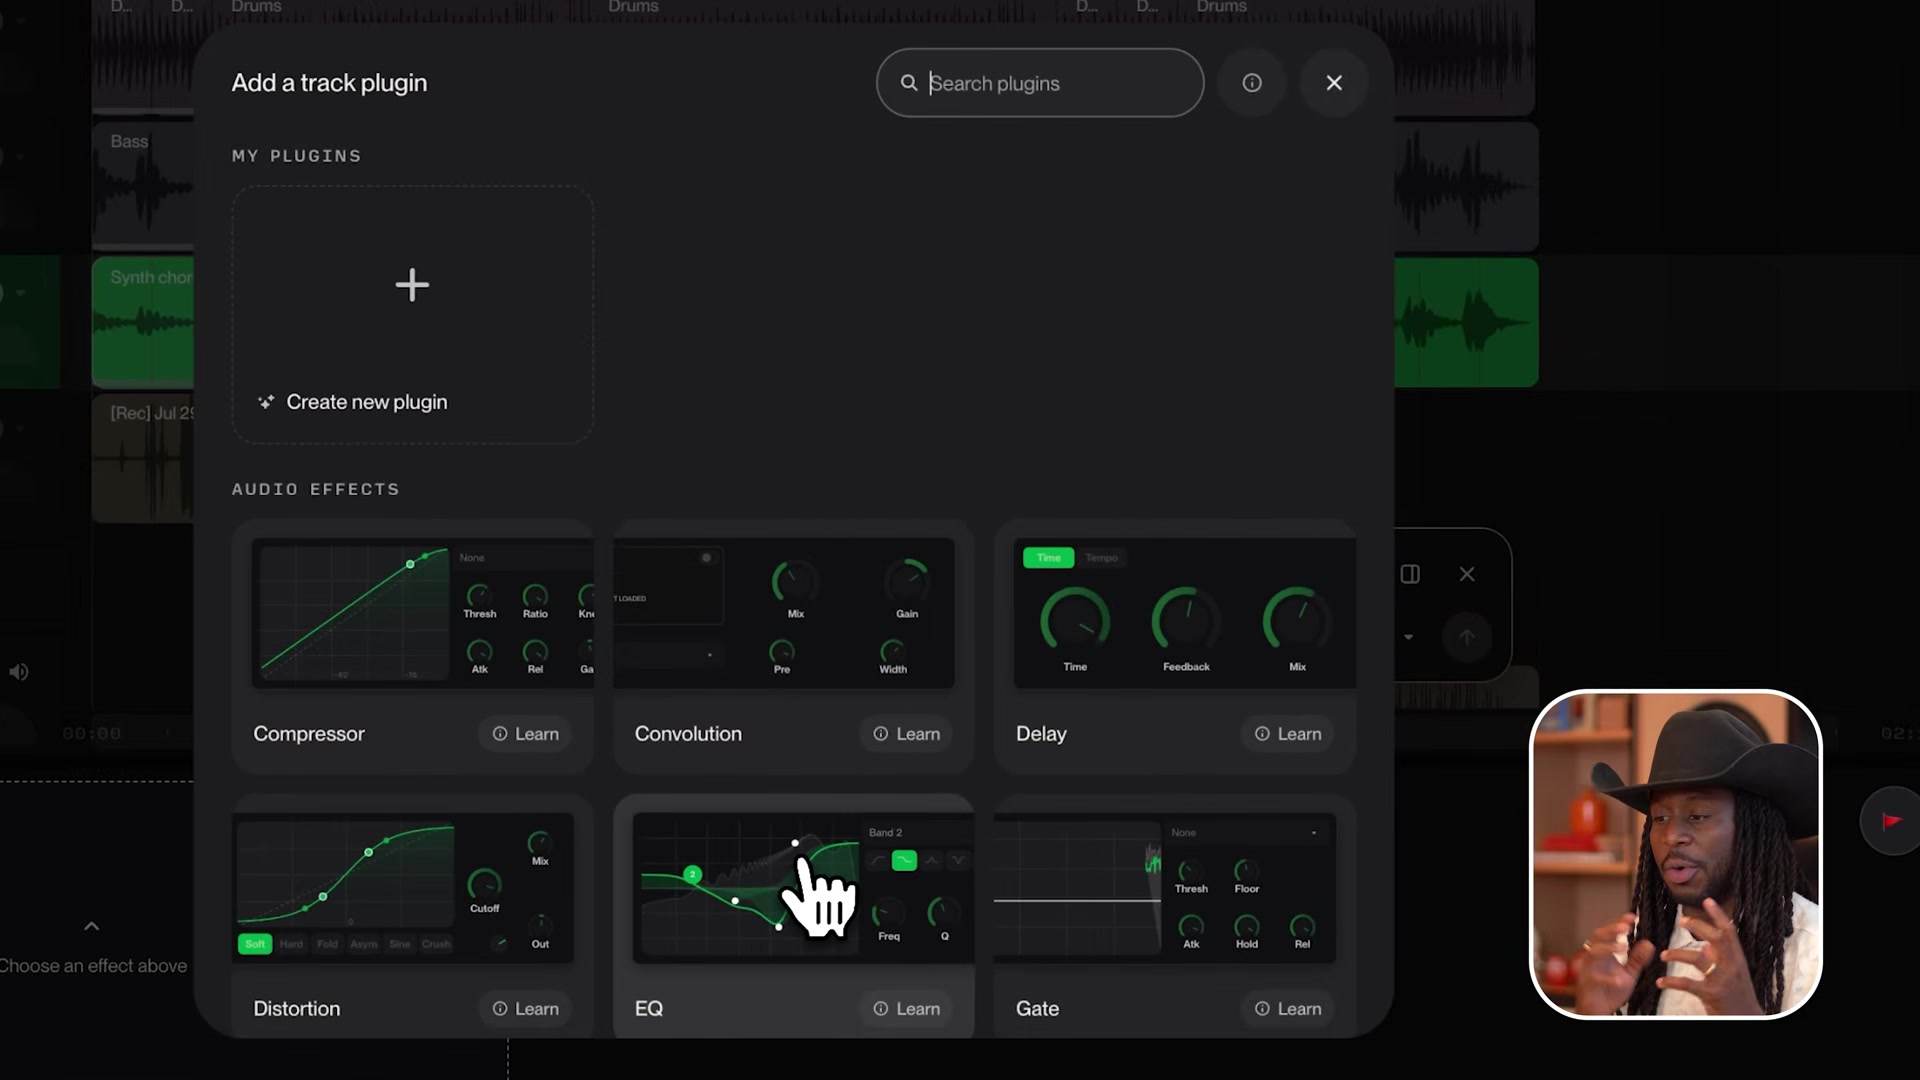
- Select a track and click Add Track Effects at the bottom of the screen.
- Pick an effect. The chain runs left to right, and you can reorder, bypass or remove each unit.
Step 3: Even out the volume with the compressor
A compressor narrows the gap between a track’s loudest and softest parts. The compressor threshold is the level where it starts working: everything above the threshold gets pulled down. Start with the threshold high, lower it until the meter shows movement on the loud phrases, and stop before the part sounds squashed.
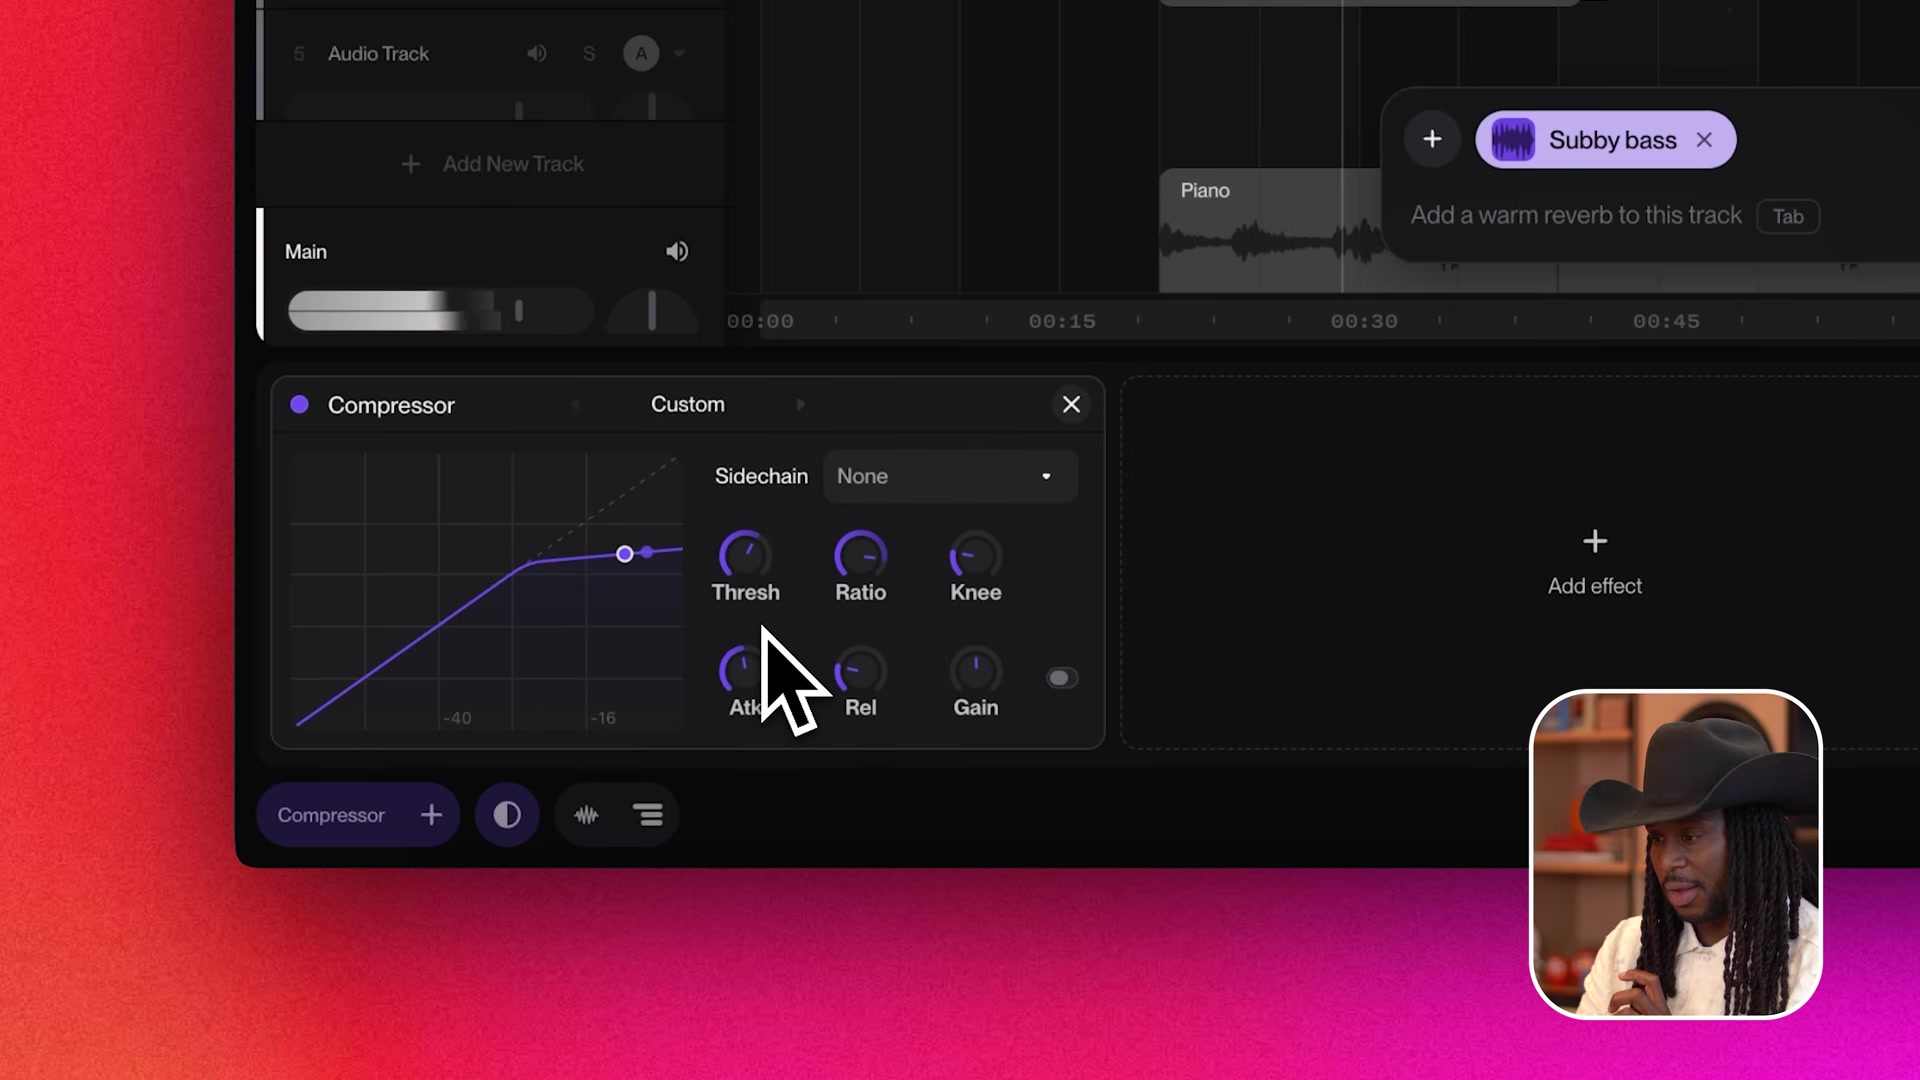
Step 4: Duck one track under another with sidechain compression
Sidechain compression points the compressor at a different track’s signal. Pick a sidechain input in the compressor panel, and your track dips whenever the input plays. Suno demos drums ducking a synth: every kick pushes the synth down, and the groove pumps.
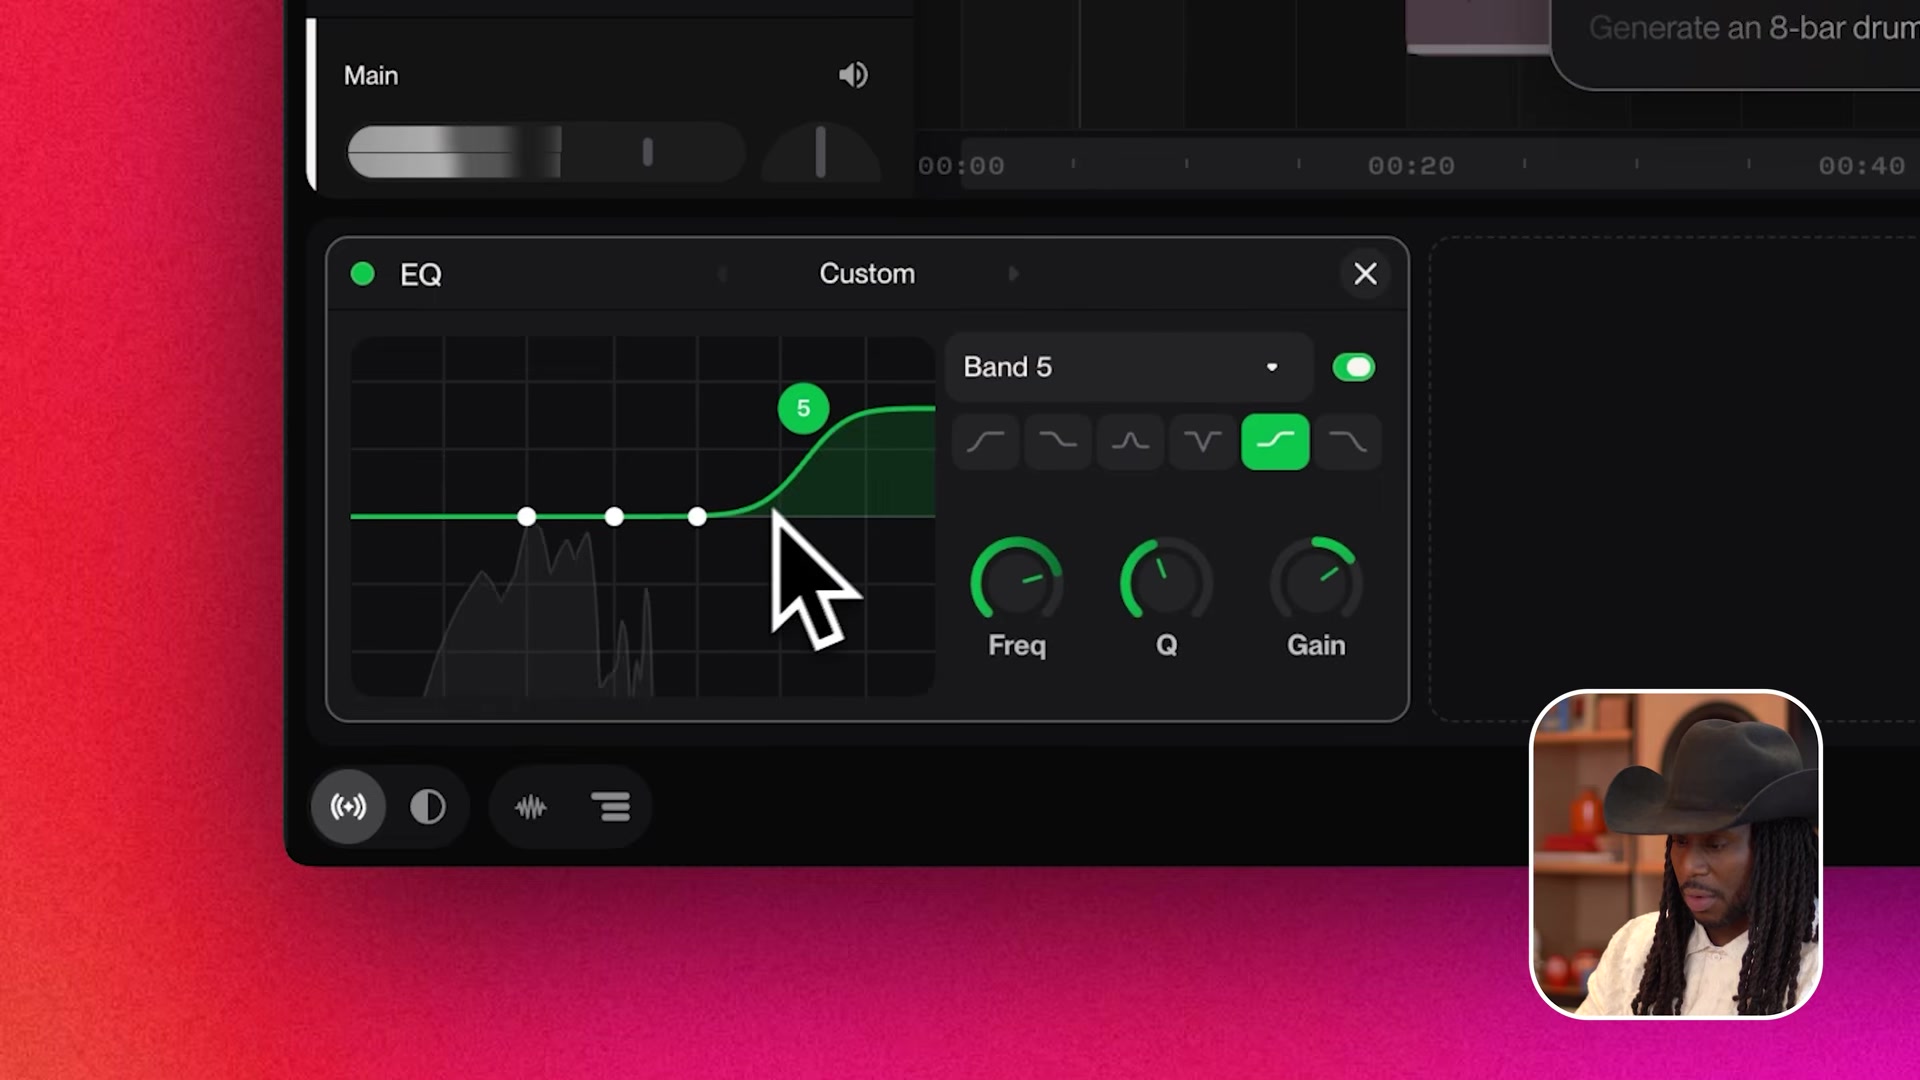
Step 5: Shape the tone with EQ
EQ raises or lowers frequency ranges. The practical EQ settings for a first mix: cut lows on everything except bass and kick (that is where mud lives), pull a little around the low mids when a part sounds boxy, and add a gentle high shelf when a vocal needs air.
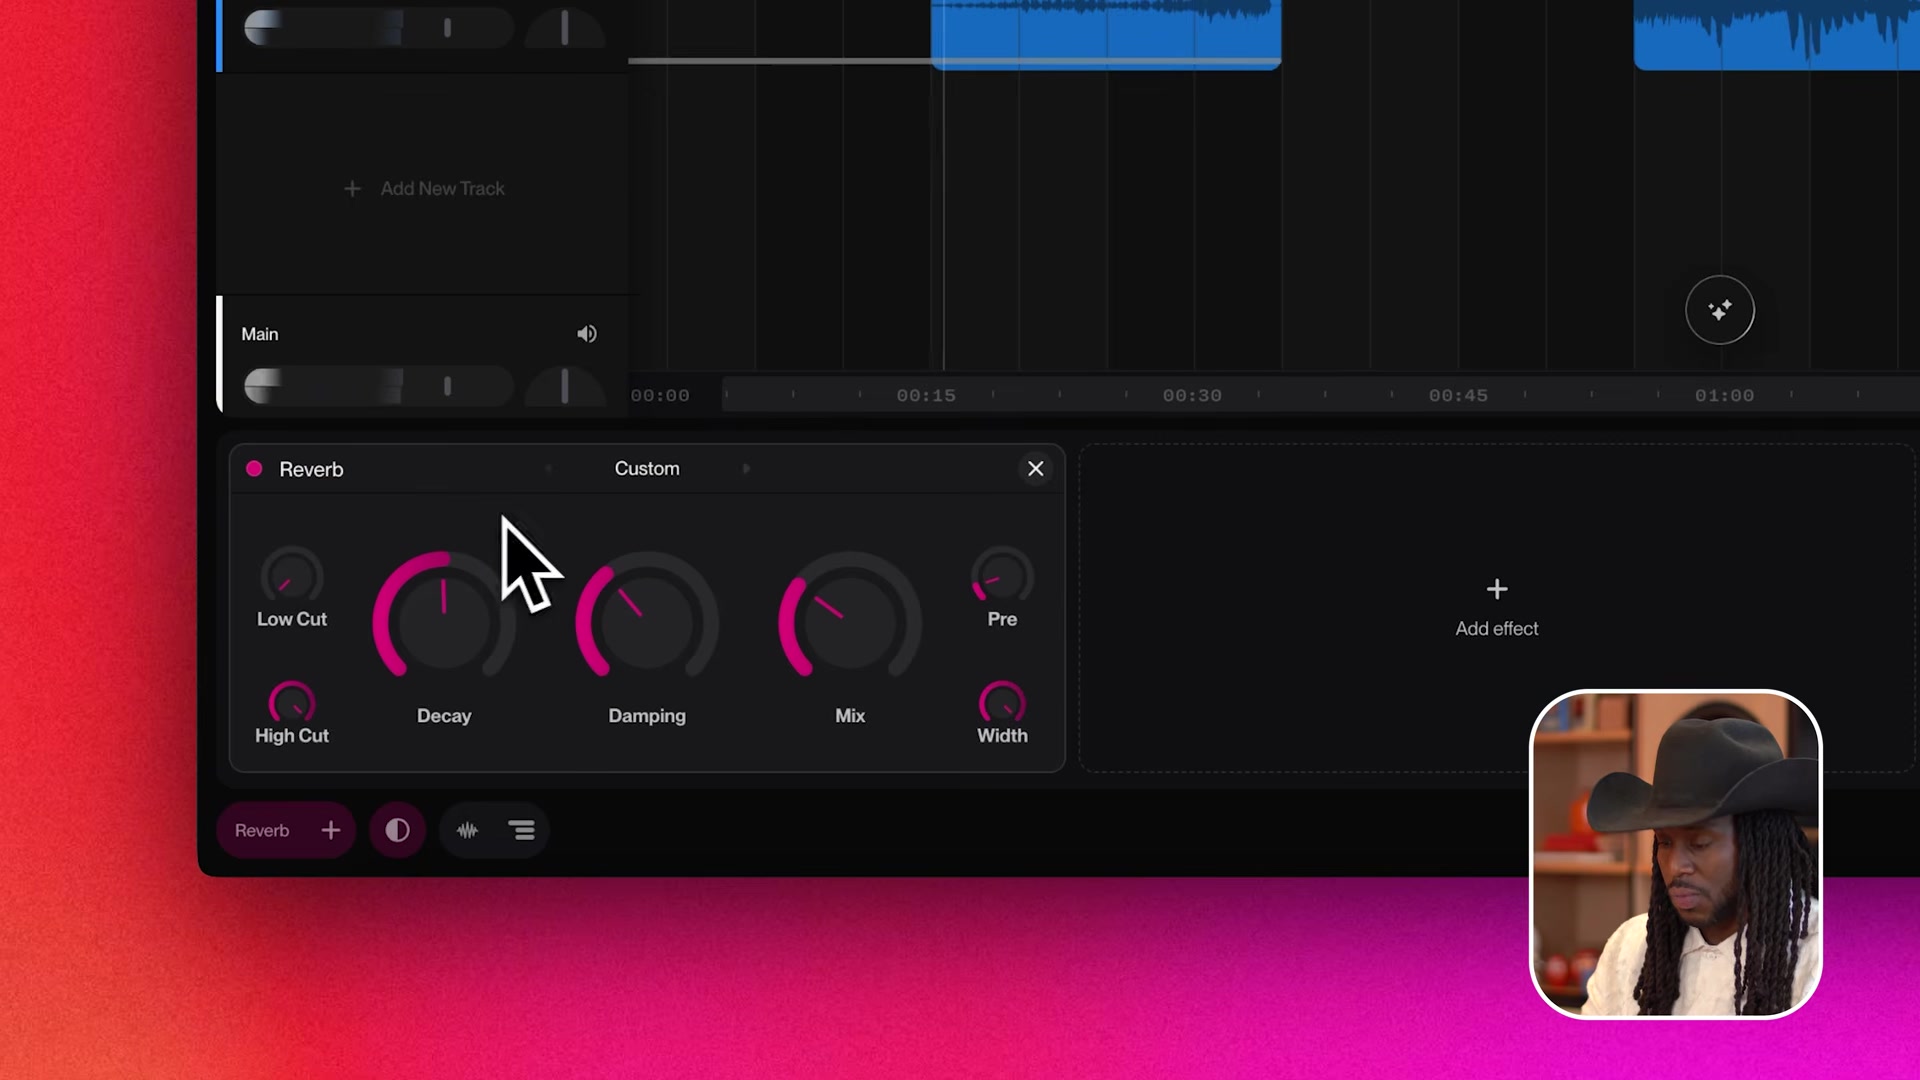
Step 6: Add space with reverb and convolution
The standard reverb generates a synthetic space, and decay sets how long it rings while dampening rolls off its top end. Convolution reverb goes further: it uses an impulse response, a recorded fingerprint of a real space, so the track sits in an actual room. Adam demos the Pantheon and a freight elevator in the walkthrough.
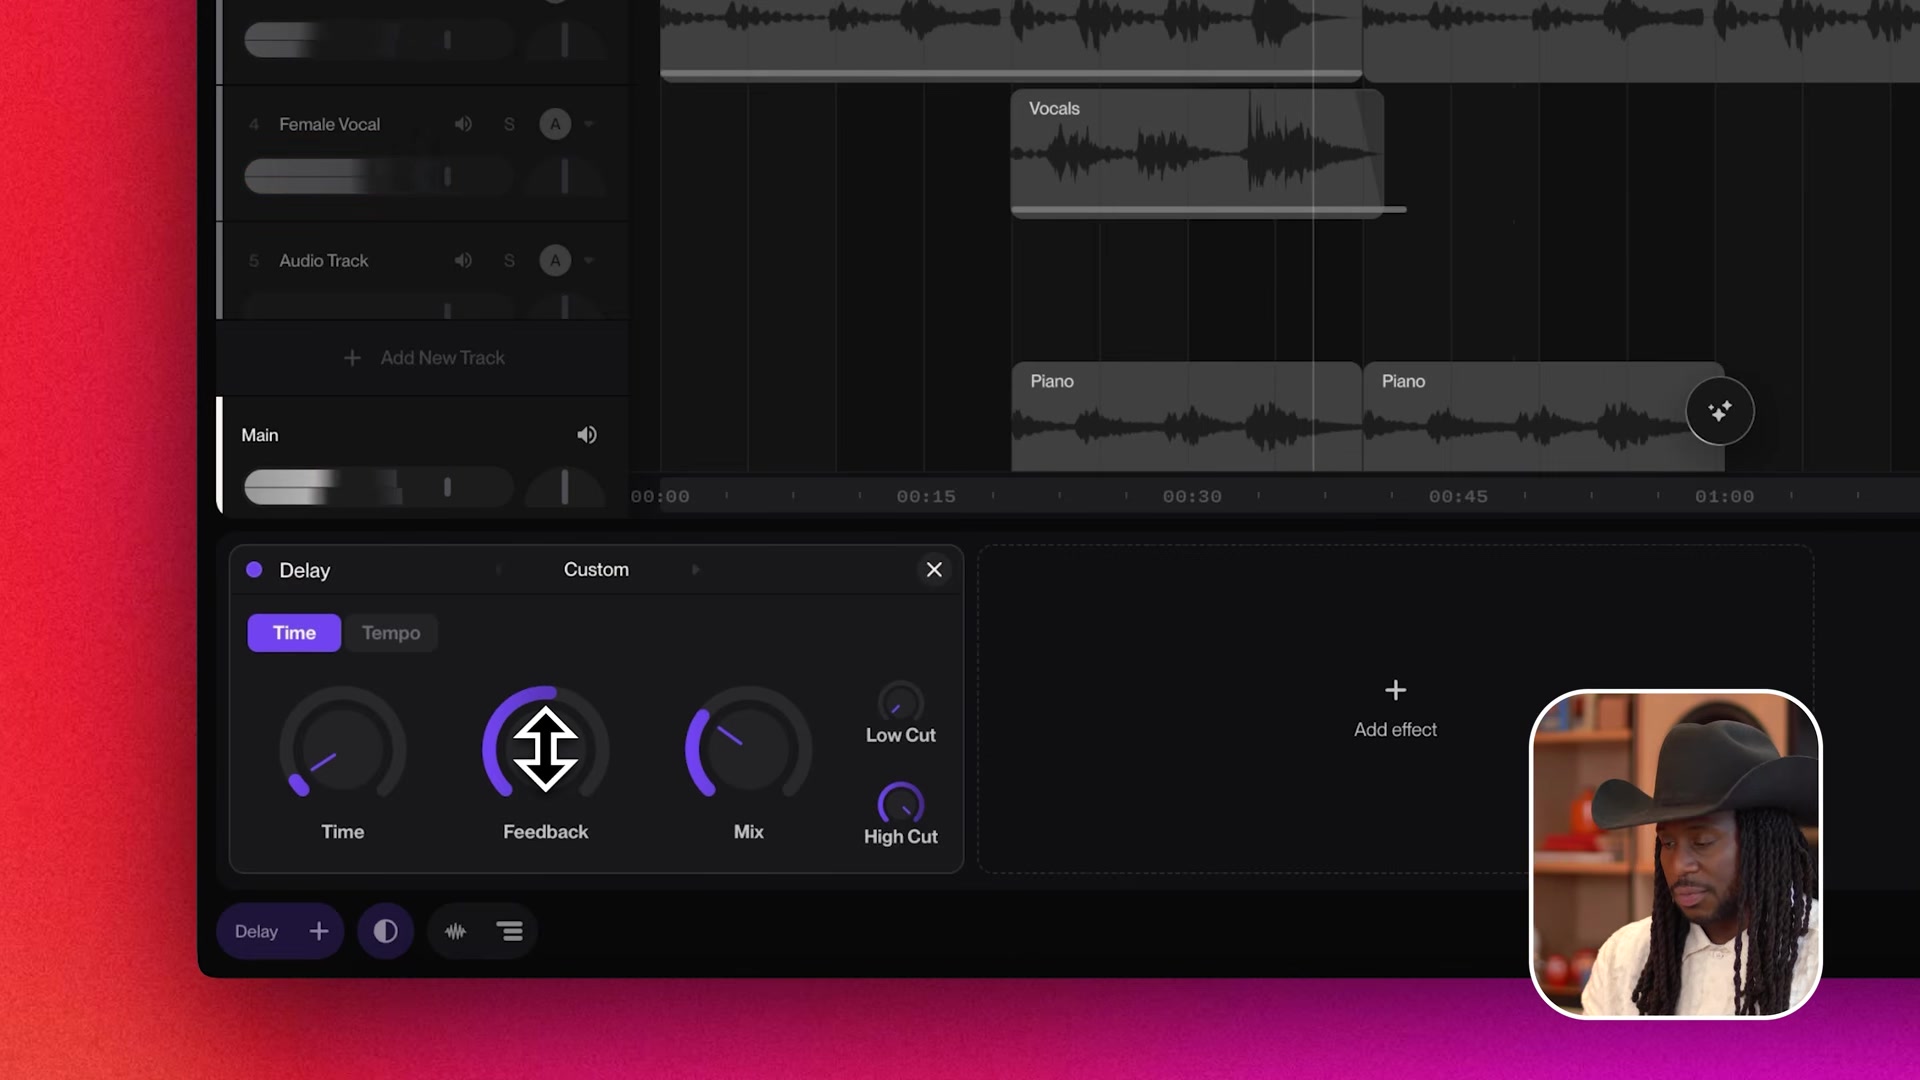
Step 7: Add movement with delay
The delay effect repeats the signal. Time sets the gap, feedback sets how many repeats trail off. Adam’s tip from the video is worth stealing: a short delay on a bassline works as a second percussion layer.
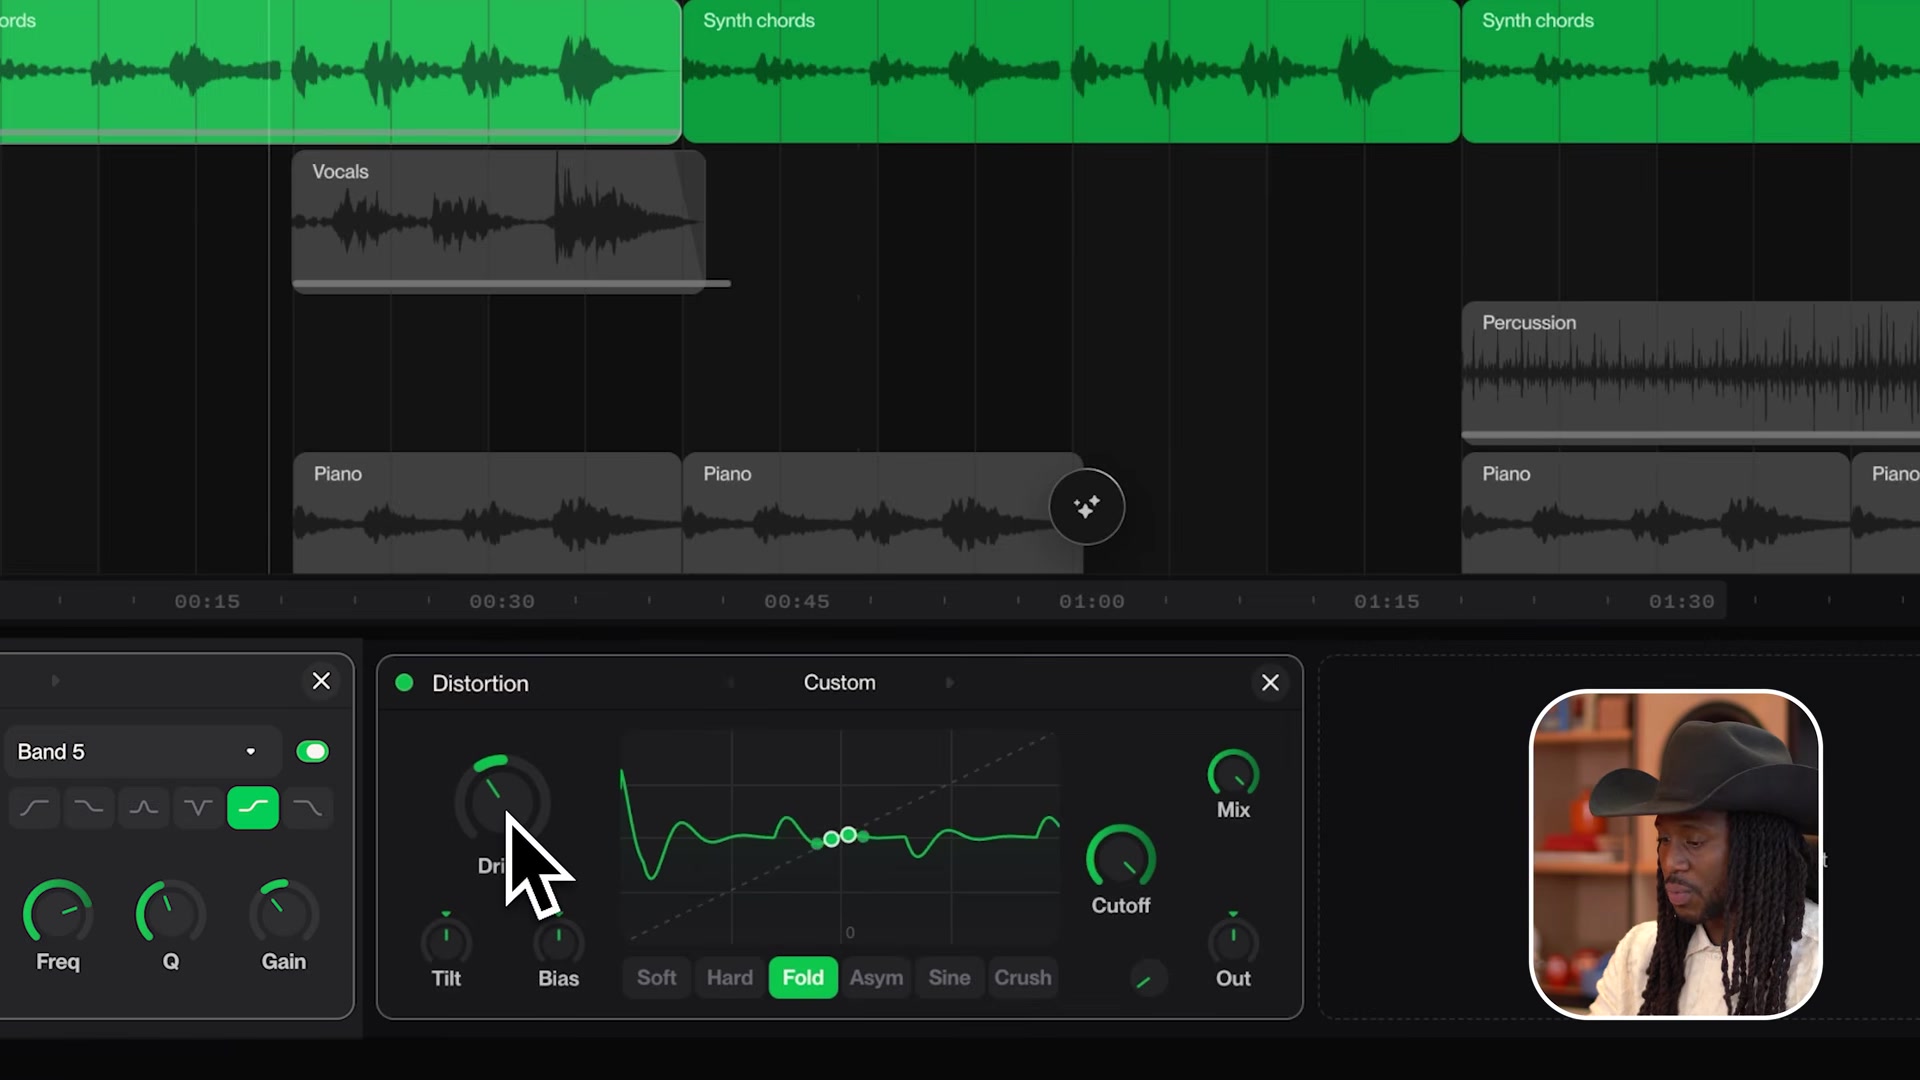
Step 8: Add grit with distortion
The distortion plugin covers drive for warm saturation, plus fold and asymmetry for harsher shapes. The mix knob blends the distorted signal against the clean one, so you can add 20 percent grit instead of committing the whole track.
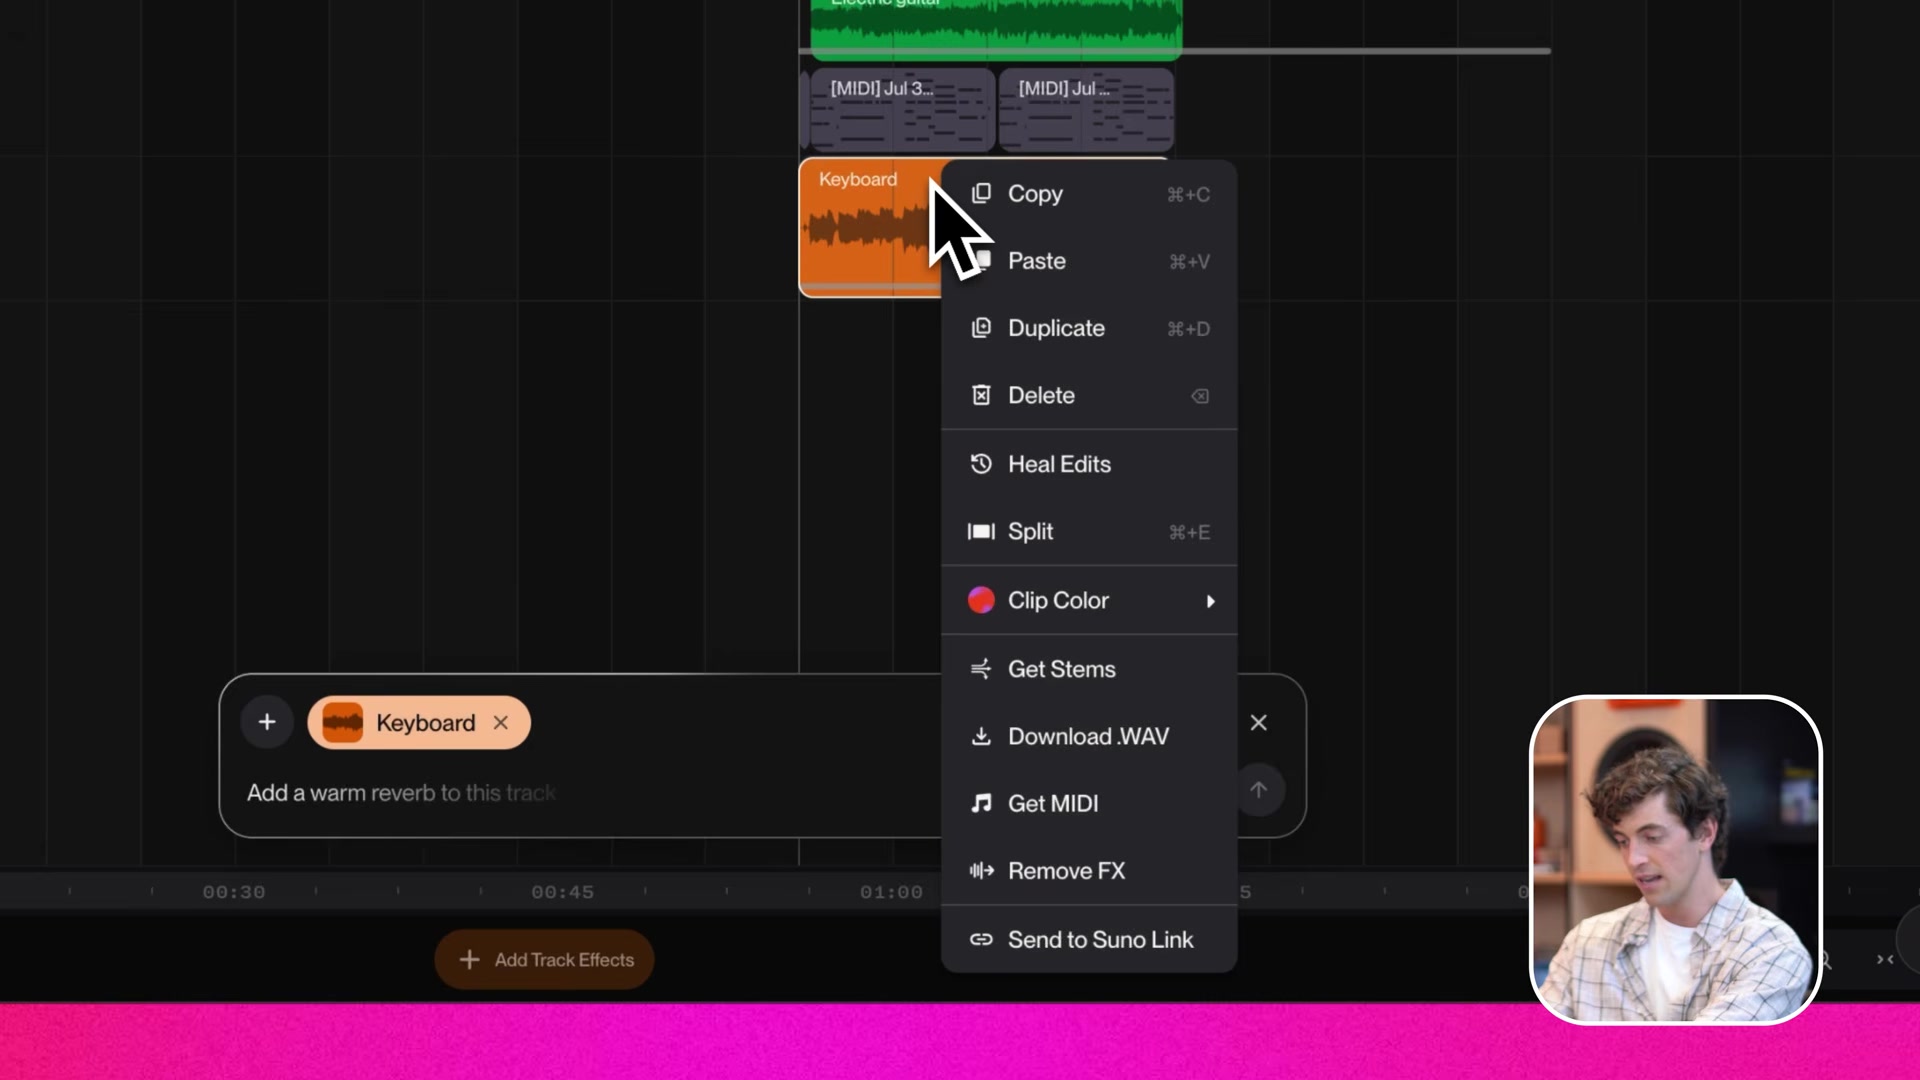
Step 9: Strip baked-in effects from generated audio
Right-click any clip and choose Remove Effects. Studio returns 2 dry lanes, stripped of the reverb and compression the generation baked in. Then process the raw part with your own chain. MusicTech’s Studio 1.0 review listed “hard to generate vocals without reverb and effects” as a con. This feature is Suno’s direct answer.
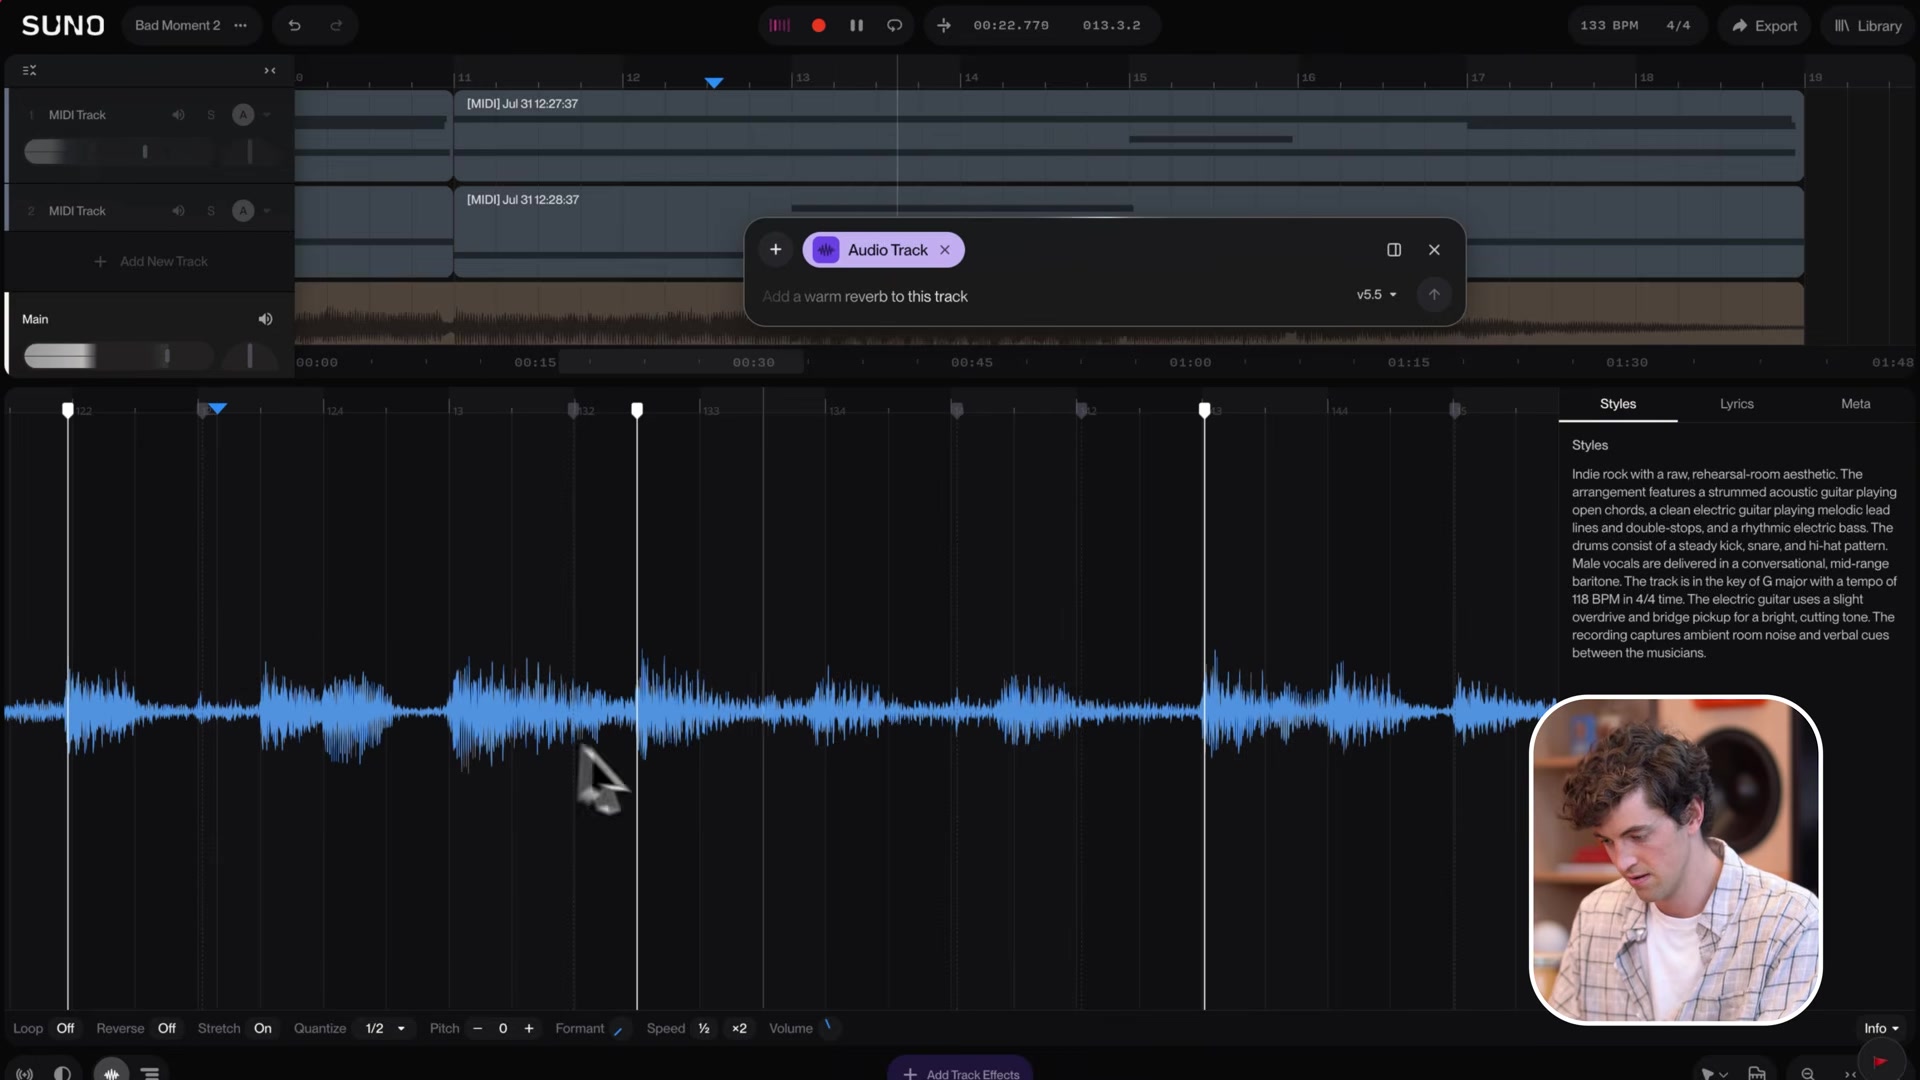
Step 10: Automate any parameter over time
- Right-click any knob, on any effect, and click Automate.
- The automation lane opens on the track. Place markers and draw the curve.
- Classic first moves: open the EQ’s high cut into the chorus, push delay feedback on the last vocal word.
Suno’s automation guide lists every automatable parameter, including pan and volume.
Step 11: Use clip fades where automation is overkill
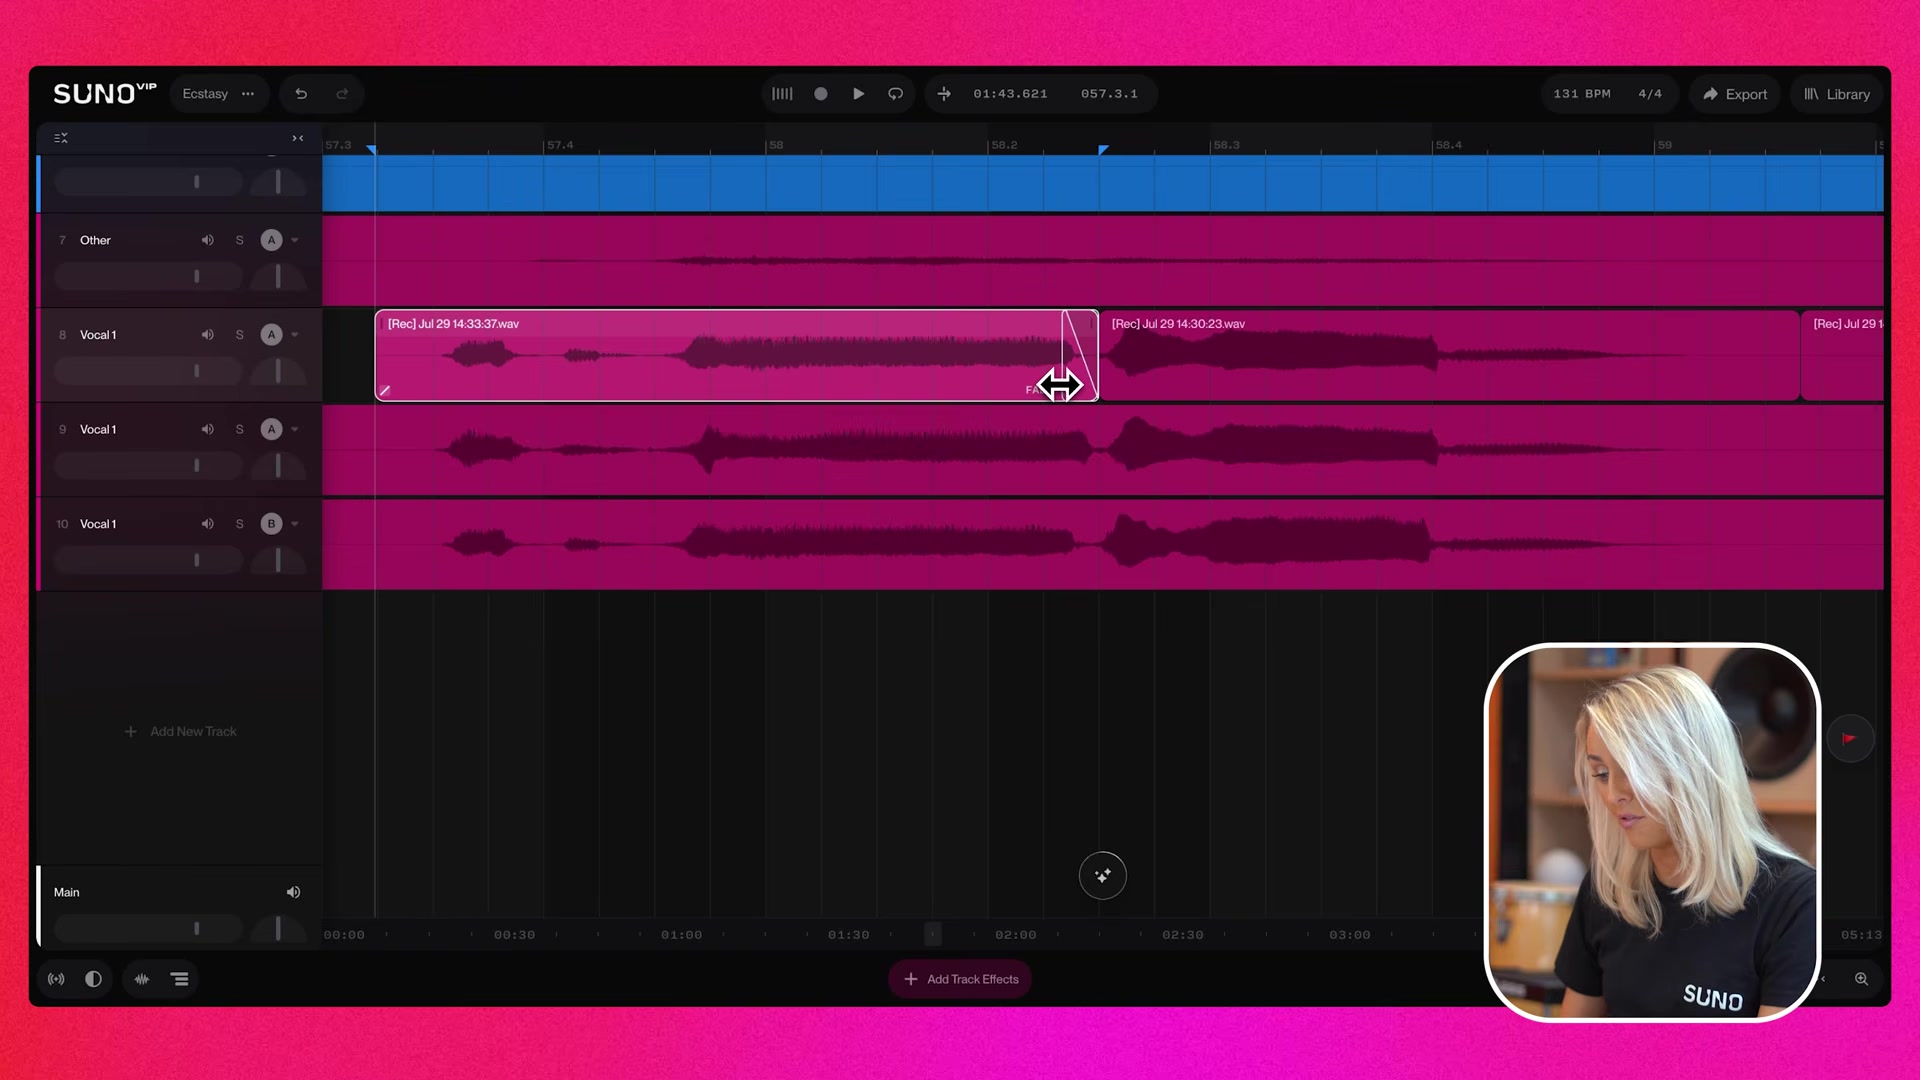
Fades are per clip: drag the fade icon at a clip’s corner, press Shift+F, or select a range and press Ctrl+F. Automation runs the whole track. The rule of thumb: edges of a clip, use a fade. Changes across a section, use automation.
What common mixing mistakes trip people up in Suno Studio, and how do you fix them?
The usual suspects, with fixes:
- Everything through one reverb, everything drowns. Fix: reverb on 2 or 3 tracks at most, dry bass and kick.
- Compressing before EQ on a muddy part. The compressor reacts to the mud. Fix: cut the lows first, compress second.
- Mixing the original stereo file alongside its stems. Doubles everything. Fix: mute the source track once the stems are in.
- Expecting your VSTs to load. They will not. Fix: use the 7 built-ins, or describe the missing effect to the chat bar and let Studio build it. My guide to building plugins in Suno Studio covers the prompts.
How do you get the best results from Suno Studio’s audio effects?
Five habits, ordered by impact:
- Split with Advanced Split and name instruments by ear. Cleaner stems mix themselves.
- Remove Effects on any generated part you plan to process. Start dry, add your own space.
- Cut before you boost with EQ. Cutting mud beats stacking brightness.
- Sidechain the synth or pad to the drums early. The pump makes room for everything else.
- Automate one parameter per section, no more. A mix that moves everywhere moves nowhere.
Is Suno Studio’s mixing good enough to finish a release?
For a demo, a social clip or a pitch: yes, comfortably. For a final master: the 7 effects cover the mix, and nothing here replaces a dedicated mastering stage, so run the export through a mastering tool or an engineer. The honest measure is this: 6 months ago Suno gave you a stereo file and a shrug. Now it gives you stems, a sidechain, convolution and automation in the browser. Split one of your old generations into stems and mix it for 20 minutes. The gap between raw generation and directed mix is the whole argument for Studio.
Frequently asked questions
What audio effects does Suno Studio include?
Suno Studio 2.0 ships 7 built-in effects, compressor, EQ, reverb, convolution, delay, gate and distortion. Henry Phipps, Suno's Studio product manager, says on camera there are more coming. You can also build custom effects by describing them in the chat bar.
Does Suno Studio support VST plugins?
No. Suno's help centre states Studio is not compatible with VST or Audio Units plugins. Your existing plugin folder stays in your DAW. Studio's answer is chat-built custom plugins, which behave like factory effects with presets, automation and MIDI Learn.
How does sidechain compression work in Suno Studio?
Open the compressor on a track and pick another track as the sidechain input. The compressor then ducks your track whenever the sidechain source plays. Suno demonstrates it with drums ducking a synth, the classic pumping effect.
How do you remove effects from AI-generated audio in Suno Studio?
Right-click the clip and choose Remove Effects. Studio returns 2 dry lanes without the reverb and compression baked into the generation. It works on generated audio and on audio you import, and it exists so you can process the raw part with your own effect chain.
What is the difference between clip fades and automation in Suno Studio?
Clip fades are per clip. Drag the fade icon or press Ctrl+F on a selected range and the volume ramps at that clip's edges. Automation is track-wide. Right-click a knob, click Automate, and the drawn curve controls the parameter across the whole track.
About the author

Covering AI music tools, industry shifts, and news for music creators and professionals. Twice-weekly newsletter at aimusicpreneur.com.