
How to master a song online with SoundBoost AI mastering, step by step
My stack My fav 6 tools for AI music after testing 70+
-
 ElevenMusic · Music generation
 -
 Moises · Stem separation
 -
 Controlla · Voice swap & cloning
 -
 Cryo Mix · Mixing + mastering
 -
 Neural Frames · Music videos
 -
 ONCE · Distribution
Some links are affiliate links — I earn a commission at no cost to you. Every tool here is one I run myself and truly believe in. This stack is proven.
Tested on the SoundBoost web app, Mastering Engine v4, Suite Member account (Unlimited Plus), September 9, 2026. Test track: a 4-minute ambient pop mix called Chasing Shadows Mix v1.
The mix is done. You play it after a Spotify track and it sounds small and 6 dB quieter. A mastering engineer fixes that for €50 to €90 a song, which adds up fast when you release every month.
This guide shows you how to master a song online in SoundBoost, an AI mastering service you steer with a sentence instead of a plugin chain. I ran my own mix through the workflow below and screenshotted each screen. Where a step leans on SoundBoost’s release notes instead of my own session, I say so. You will leave with a release-ready master and a way to check it with a free meter.
What you need to master a song in SoundBoost
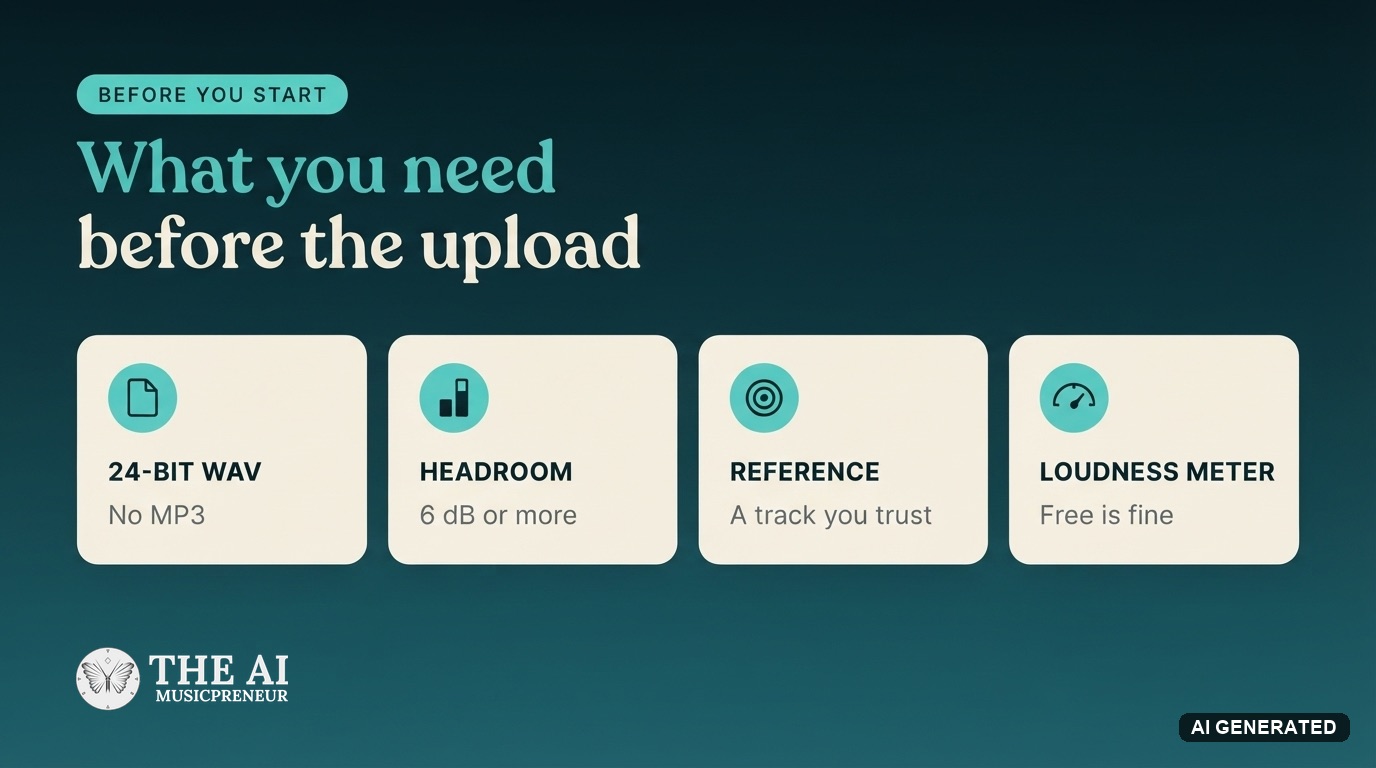
Have these ready before you upload:
- A finished stereo mix as a 24-bit WAV or FLAC at 44.1 kHz or higher. SoundBoost’s FAQ says to avoid MP3 input.
- Peaks around -6 to -10 dBFS and no limiter on the master bus. Headroom is the space between your loudest peak and 0 dBFS, and the engine needs it.
- A Suno or Udio WAV works too. Suno’s WAV export is Pro and Premier only, and my Suno download caps piece lists the limits per plan.
- A SoundBoost account. The free preview works without signup. Clean downloads need Unlimited ($16 a month or $48 a year) or Unlimited Plus ($24 a month or $72 a year), per the pricing page. Bulk mastering and unlimited revisions are Plus only.
- A Spotify track your song should sit next to.
- A free LUFS meter such as Youlean Loudness Meter. LUFS is the loudness scale streaming services use, and true peak is the highest point the audio reaches after conversion to analog.
Before you start, rename the file with a version and a date. A year from now you will have 4 masters of the same song and no idea which one shipped.
Why master a song online in SoundBoost instead of a DAW plugin?
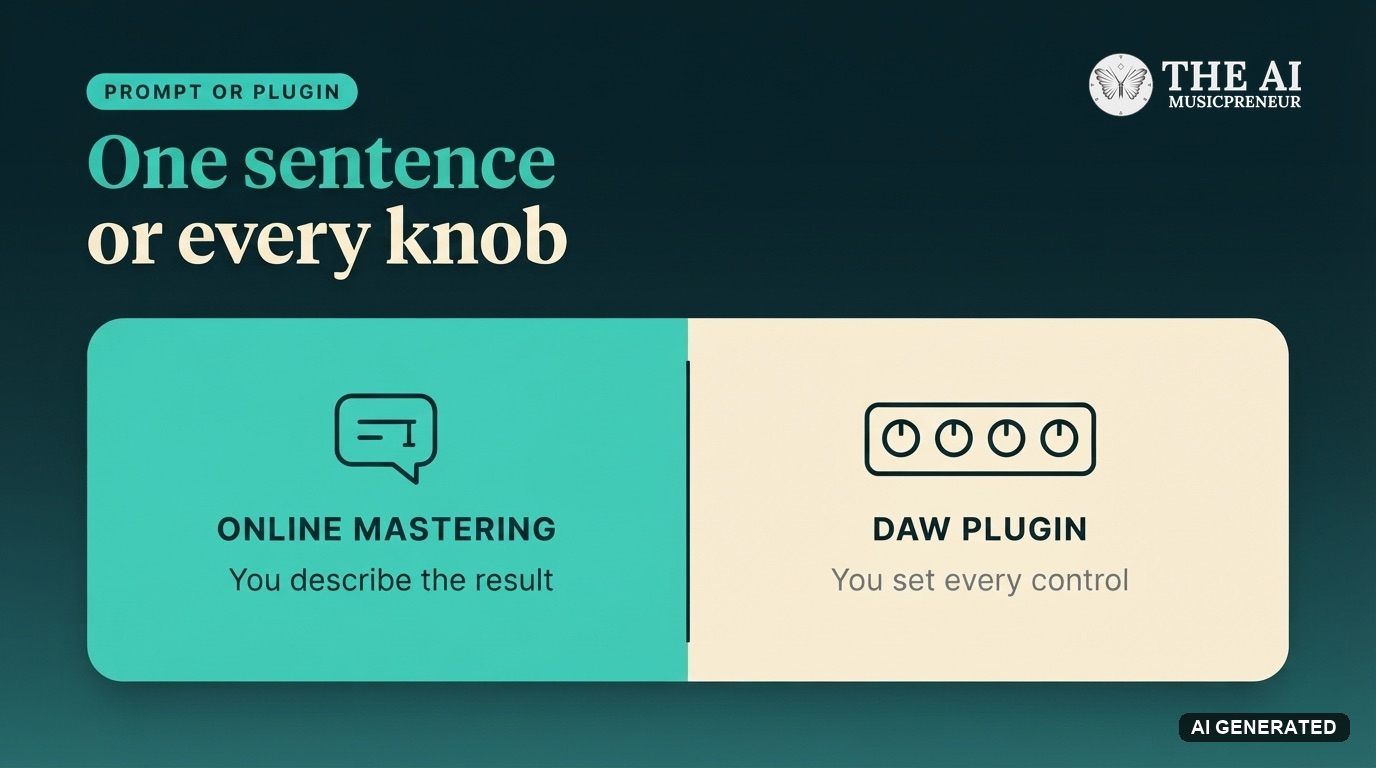
An online mastering service like SoundBoost trades precision for speed. You describe the outcome, the engine picks the chain. SoundBoost’s homepage FAQ says the engine detects genre, BPM and LUFS, then assembles a chain from “hundreds of modeled analog and digital processors” with a true-peak limiter, and the render takes about 1 minute.
Ozone gives you every knob and asks you to know what each one does.
The price gap is the second reason. LANDR lists a single master at $10. SoundBoost’s Unlimited plan is $48 a year for as many masters as you want.
Pick a plugin instead when you want to set the ceiling frequency yourself or need 96 kHz output. SoundBoost tops out at 32-bit/48 kHz. My LANDR plugin vs Ozone comparison covers that route, and my roundup of AI mastering tools shows where SoundBoost sits against 11 others.
How does AI mastering with text prompts work in SoundBoost?
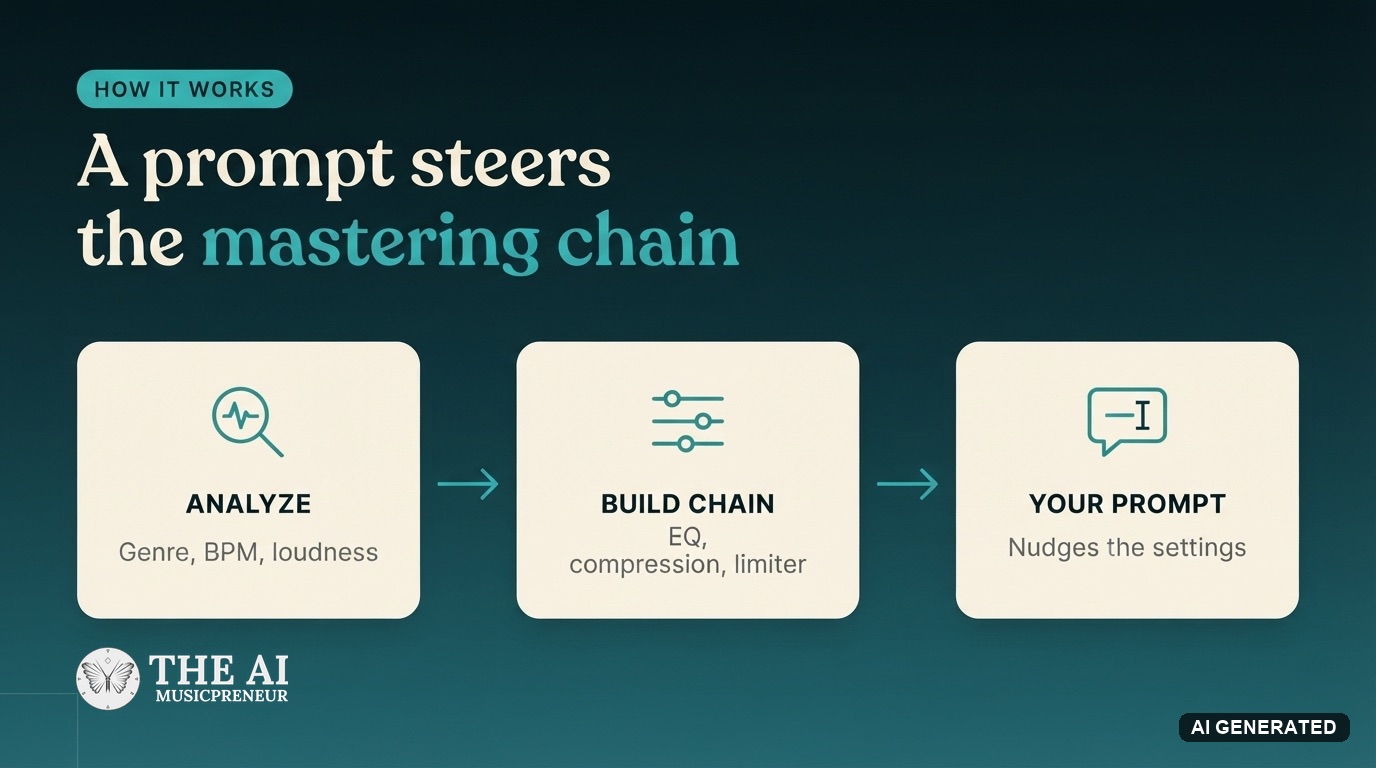
AI mastering runs in 2 stages. First the engine analyzes the upload: genre, tempo, integrated loudness, tonal balance, stereo width. Then it builds a processing chain (EQ, compression, saturation, stereo width, true-peak limiter) tuned to that analysis. A prompt nudges the chain. It does not replace it.
Here is what the prompts I ran moved, read off the reply text and the Revision Suite values after each render. The last row comes from SoundBoost’s release notes, not my session:
| Prompt | What moves in the chain |
|---|---|
| ”Warm like modern hip hop hits, with punchy bass” | Analog Warmth to Warm, Saturation to Color, Loudness to Smoother, clearer low end |
| ”Breathing highs, wide stereo field” | Tone Clarity to Clear, Stereo Width to Wide |
| ”Optimize it for Spotify” | Analog Warmth to Warm, Stereo Width to Wide, Loudness left Balanced |
| ”Master for Spotify, keep it warm, spacious and dynamic” | Stereo image wider, dynamics left alone, true peak -1 dBTP |
| ”Remove the drums and bring the vocals forward” | Stem separation, rebalance, then the master, in 1 render |
The last row is the one no other mastering service offers. Since August 5, 2026, a mastering prompt takes stem-level requests, and on September 1 SoundBoost replaced the whole DSP with Mastering Engine v4, which it says is 35% faster and trained on synthetic material, never on uploads.
Step 1: Upload the mix and pick the peak moment in SoundBoost
The UI path in the SoundBoost dashboard:
- Click Upload Track in the left menu. The Mastering tab is selected by default, with Single and Bulk toggles top right.
- Drag the WAV onto Upload Track & Start Mastering, or click SoundCloud Import and paste a link.
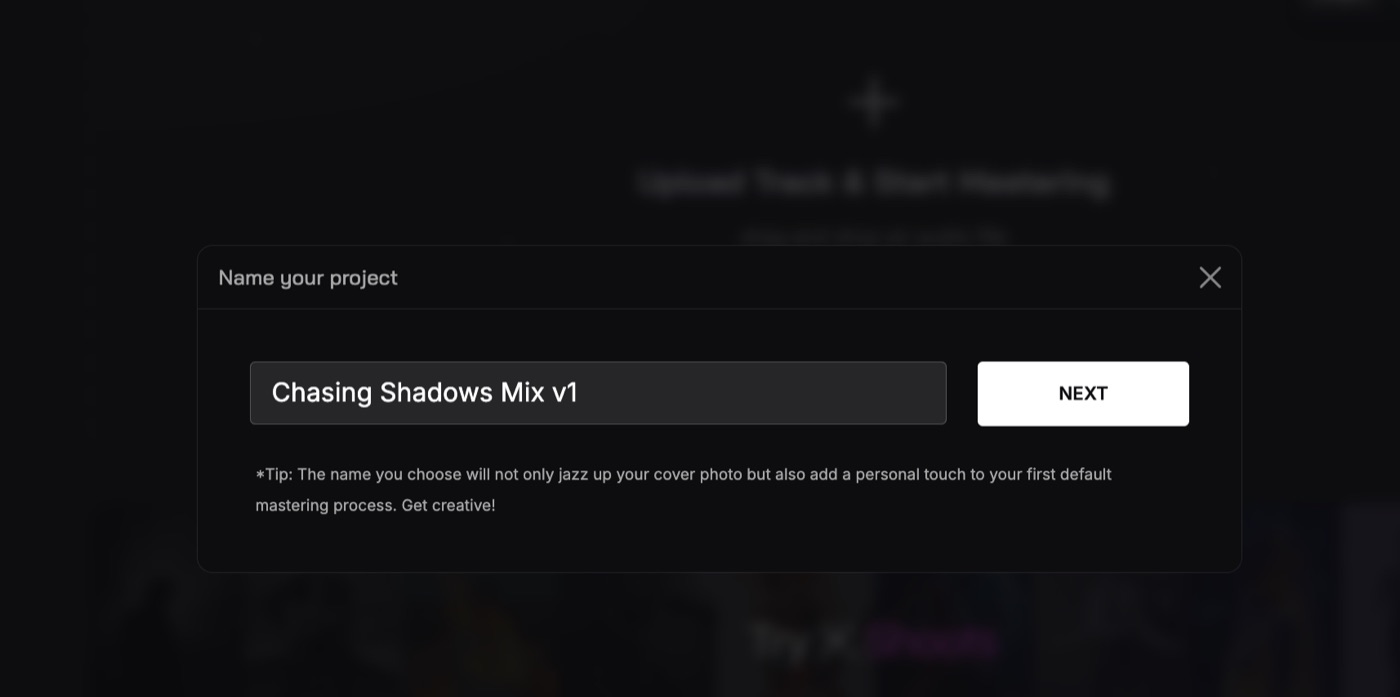
- Name your project in the popup and click Next. I called mine Chasing Shadows Mix v1.
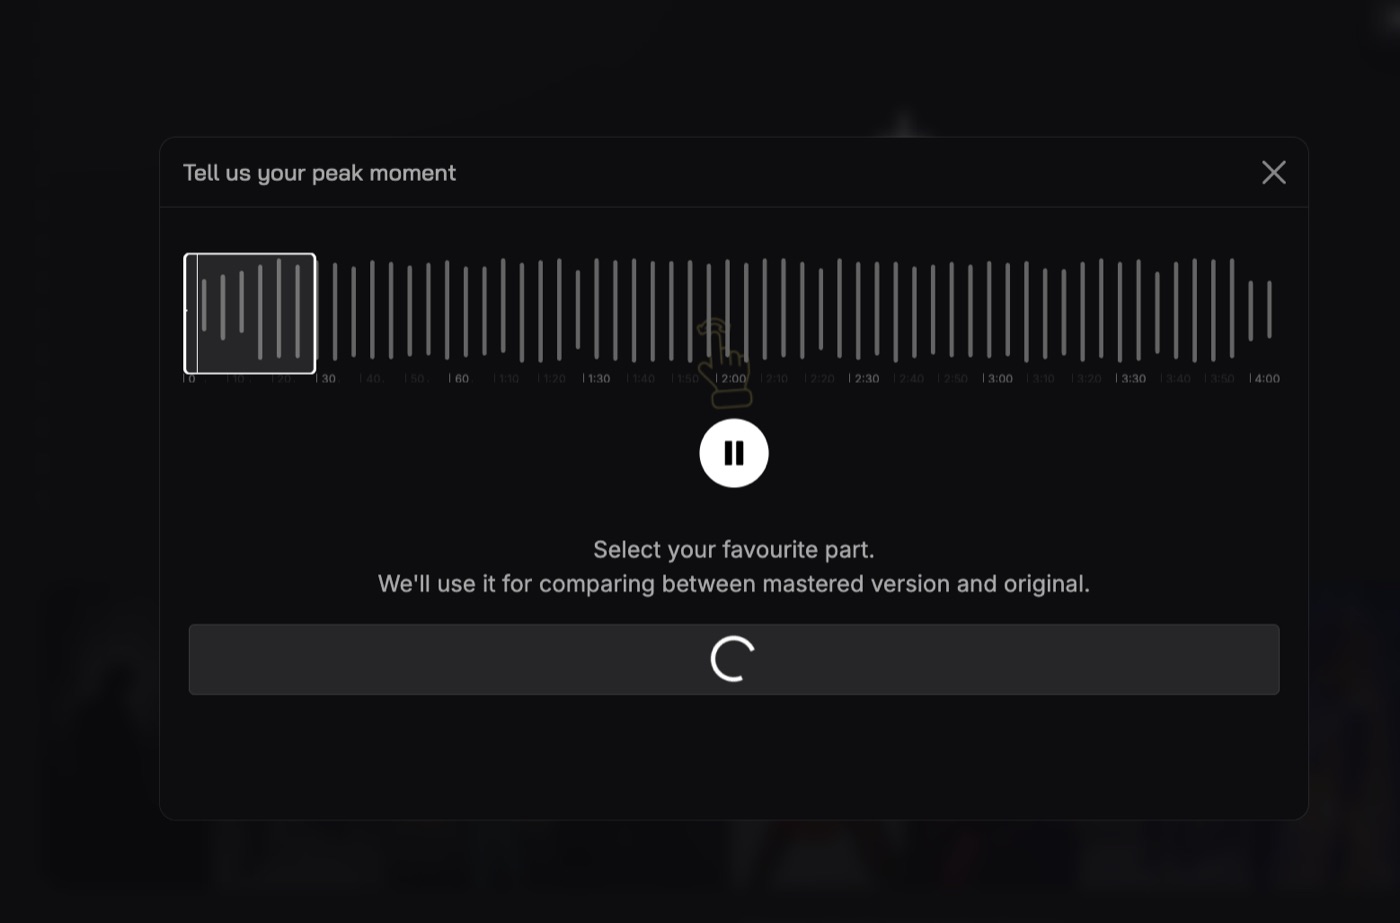
- In Tell us your peak moment, drag the 30-second window onto the loudest section (a chorus, a drop) and confirm.
Step 2: Choose a mastering engineer in SoundBoost
Open the Mastering Engineer panel at the top of the Revision Suite on the left. The 6 options:
- Default: balanced, any genre
- Sophia “Silk Touch”: smooth and warm, jazz and soul
- Alex “The Puncher”: punchy and dynamic, electronic and hip-hop
- Marcus “The Wall”: loud, rock and metal
- Luna “Crystal Clear”: clear and detailed, acoustic and classical
- Kai “The Analog”: tube warmth and vintage hardware
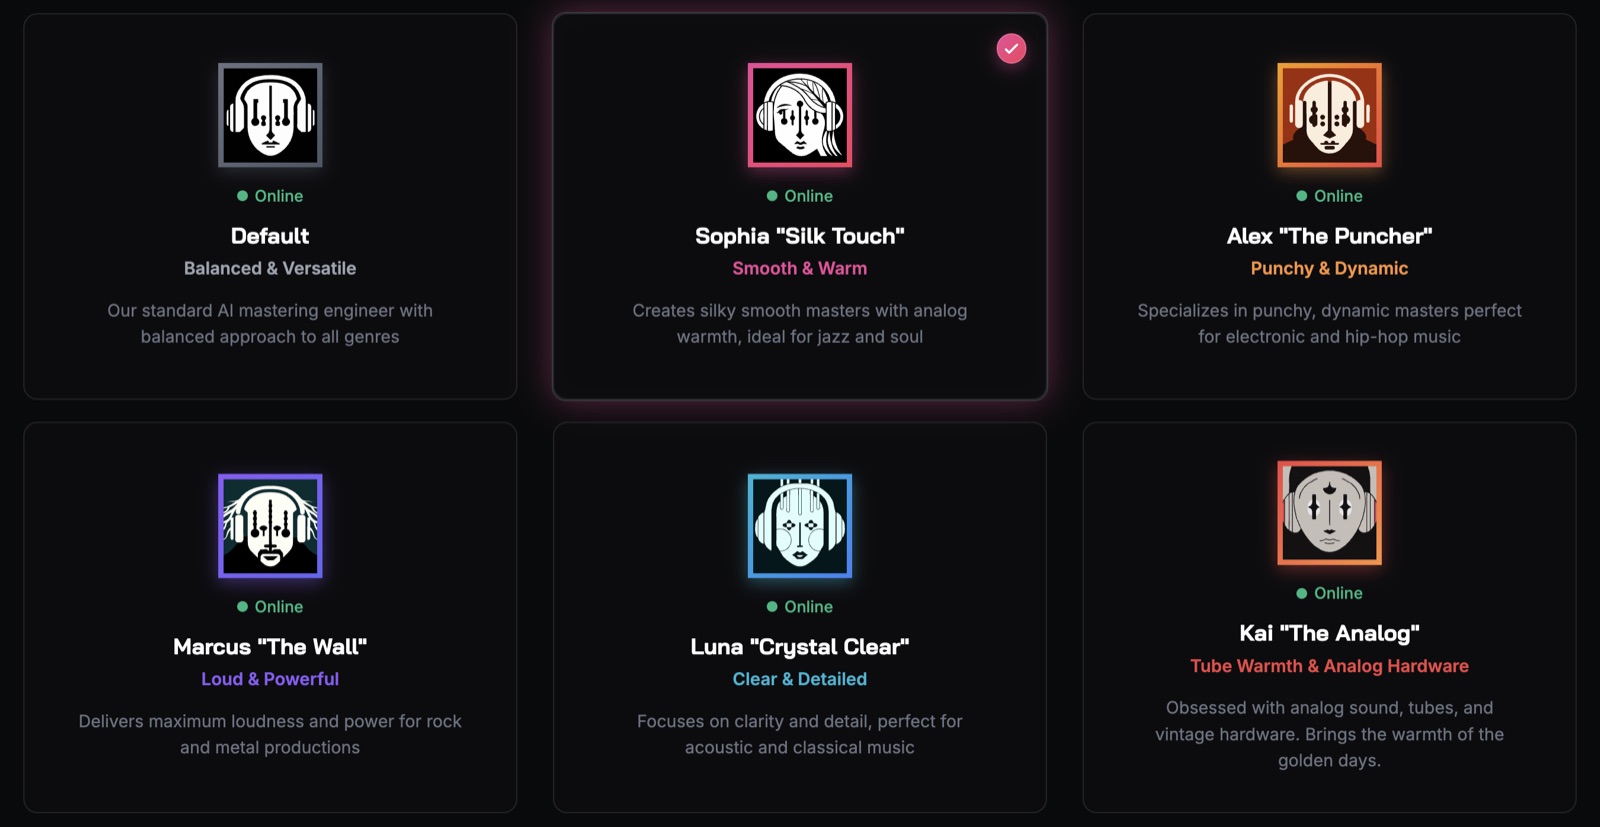
I picked Kai for the ambient track. The engine tagged the genre as Electronic, Downtempo and Ambient on its own, which matched what I would have written.
Step 3: Write the first mastering prompt in SoundBoost
Type into the Prompt bar and click Apply Prompt. Examples that worked in my sessions and in SoundBoost’s App Store copy:
- “Warm like modern hip hop hits, with punchy bass”
- “Optimize for a club that has MONO speakers only”
- “Breathing highs, wide stereo field”
- “Master this ambient pop track for Spotify. Keep it warm, spacious and dynamic. Control peaks without crushing the transients.”
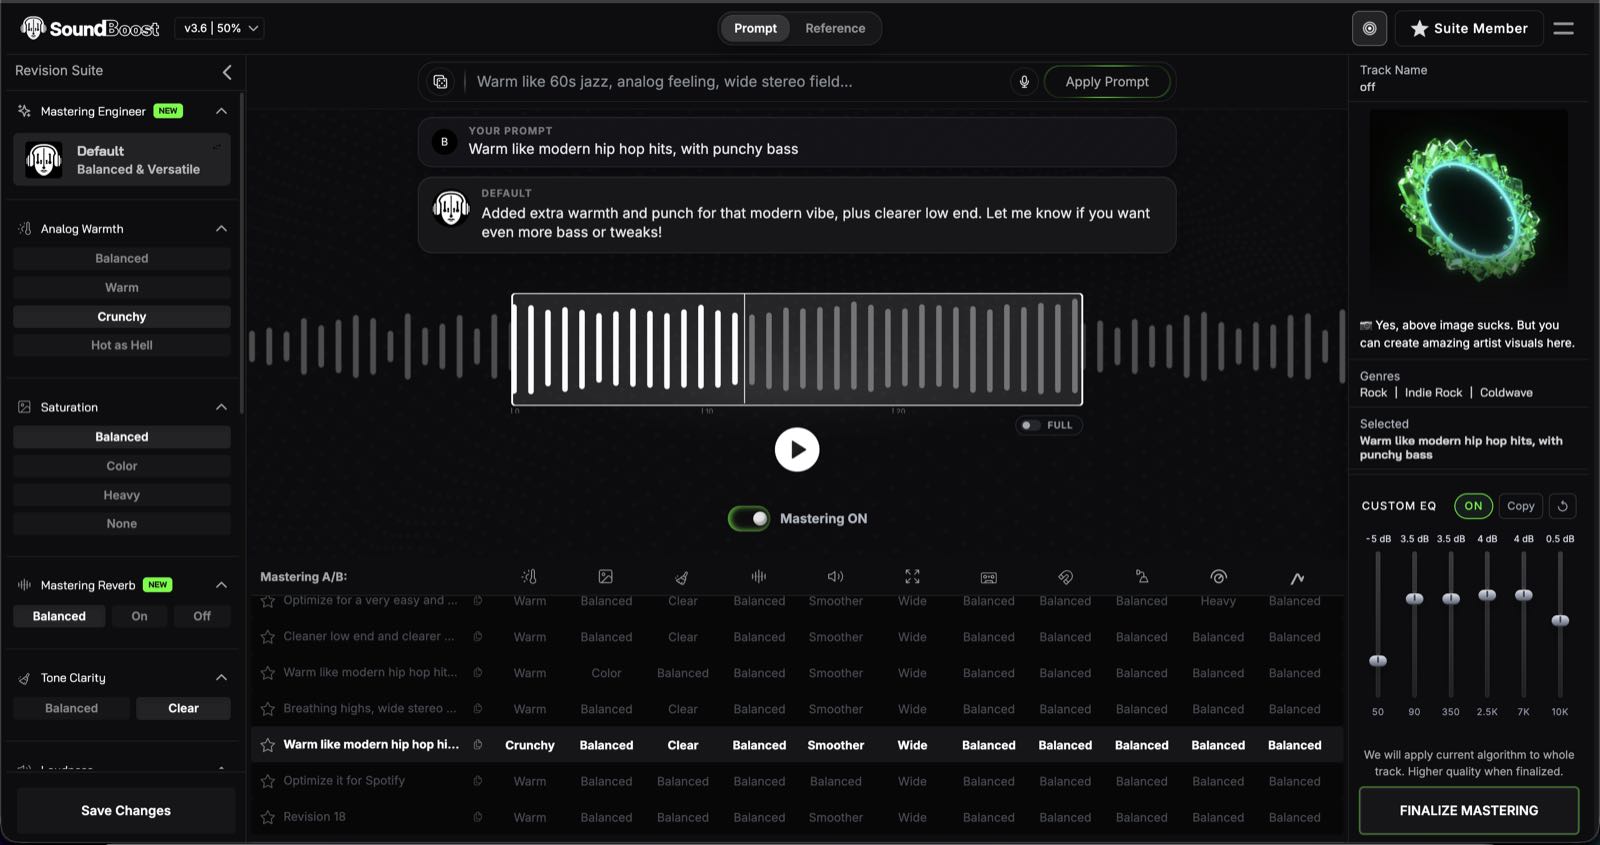
Read the reply. The engineer writes back what it changed, and that text is your log of the render.
Warmed things up, made the stereo image wider and kept the dynamics intact. Peaks and harshness are tamed, and the true peak is set to -1 dBTP for streaming.
AI Tune Craft’s walkthrough runs the same flow on a Suno track and shows the revision suite in motion:
Step 4: Or say it with SoundBoost Voice Mode
Click the microphone icon at the right end of the Prompt bar. A Voice Mode panel opens and says “Speak your mastering prompt. Press Enter to send.”
- Talk while the panel reads Listening. Say it the way you would tell an engineer, not in keywords.
- Your words appear as text in the box as you speak.
- Read the transcription, fix any word it got wrong, then click Apply Prompt or press Enter.
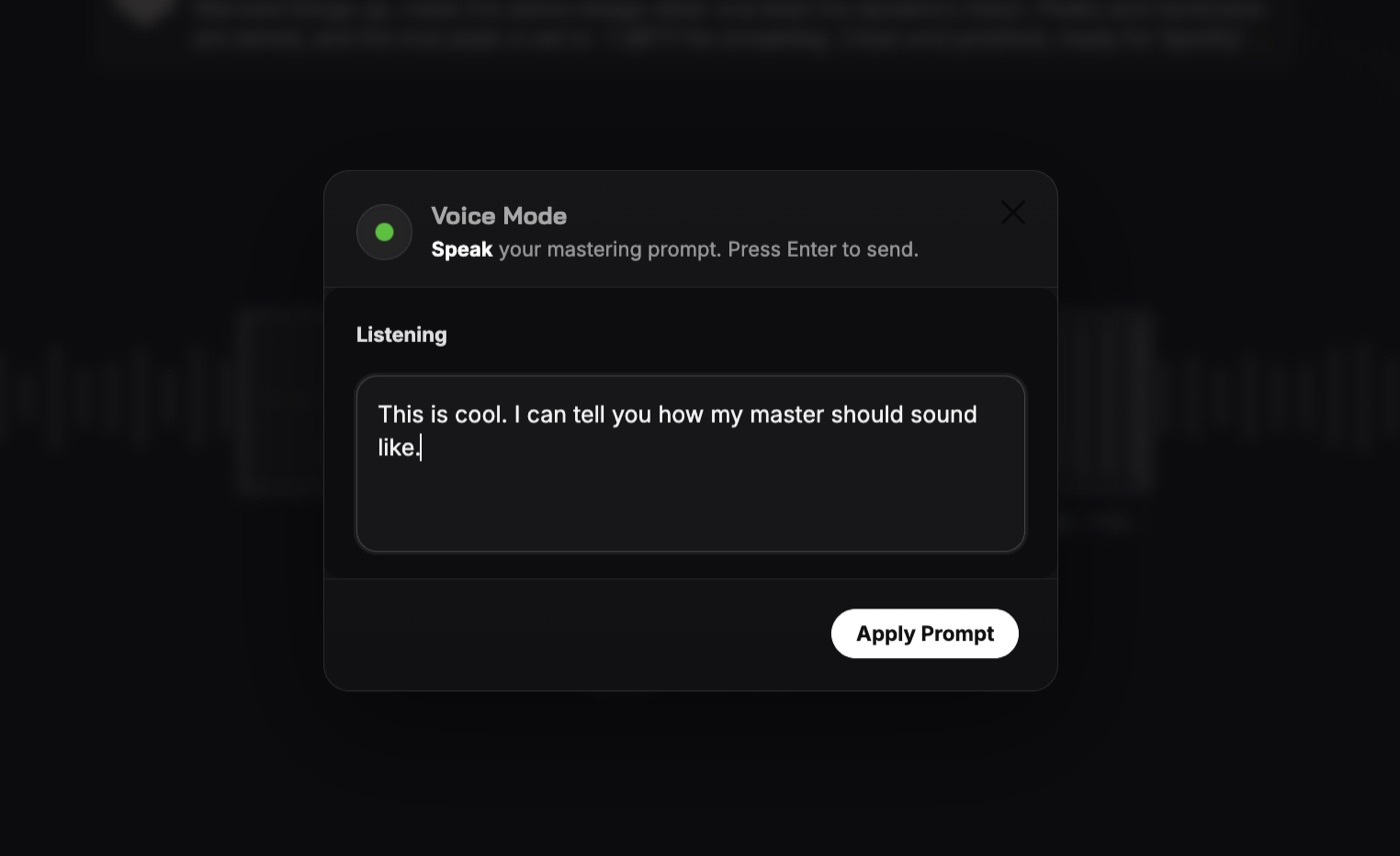
The edit step is the part I did not expect. Voice Mode hands you the text before it renders, so a misheard word costs you a correction instead of a wasted revision. SoundBoost shipped this on June 25, 2026.
Step 5: Master to a Spotify reference in SoundBoost
Switch from Prompt to Reference at the top of the page:
- Type the track, artist or album in Search track, artist or album.
- Pick the song from the dropdown.
- Click Apply Reference.
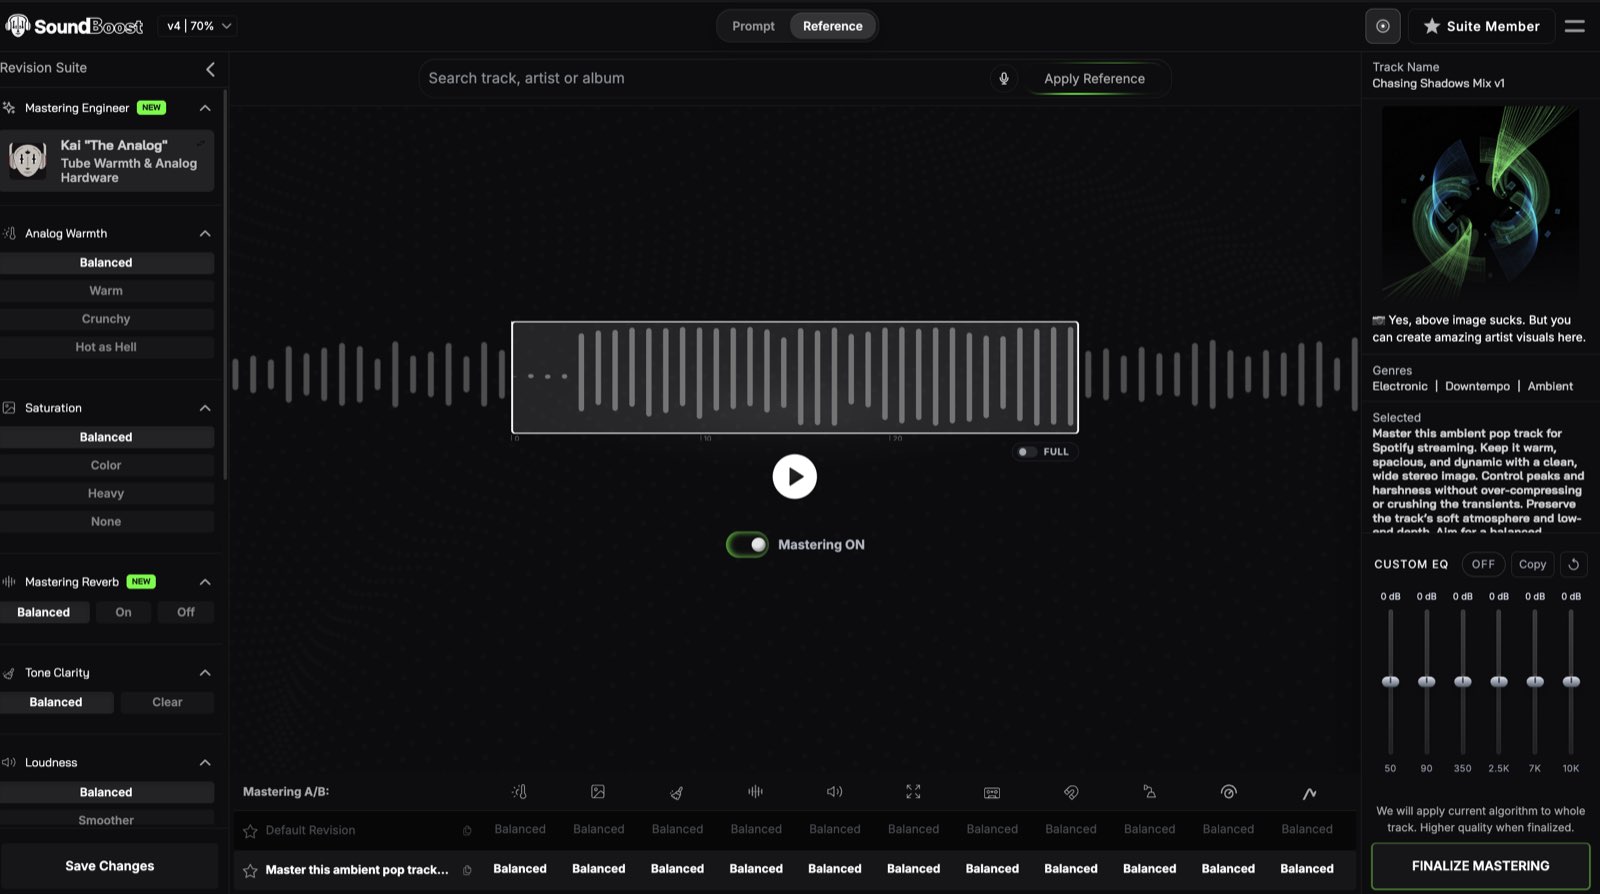
Reference mastering matches the EQ curve, the loudness and the dynamic range of the reference. It does not copy the arrangement or the vocal-to-instrument balance, because those live in your mix. So a reference with a louder vocal than yours will not fix a buried vocal.
Step 6: Fine-tune in the SoundBoost Revision Suite and Custom EQ
Every module the engine used sits in the Revision Suite as a row of buttons: Analog Warmth, Saturation, Mastering Reverb, Tone Clarity, Loudness (Balanced, Smoother, Loud, Crunchy, Aggressive), Stereo Width, Tape Effect, Compressor Style, Mono Compatibility, De Esser and True Peak (Balanced, 0, -1, -2). Click a value, then Save Changes.
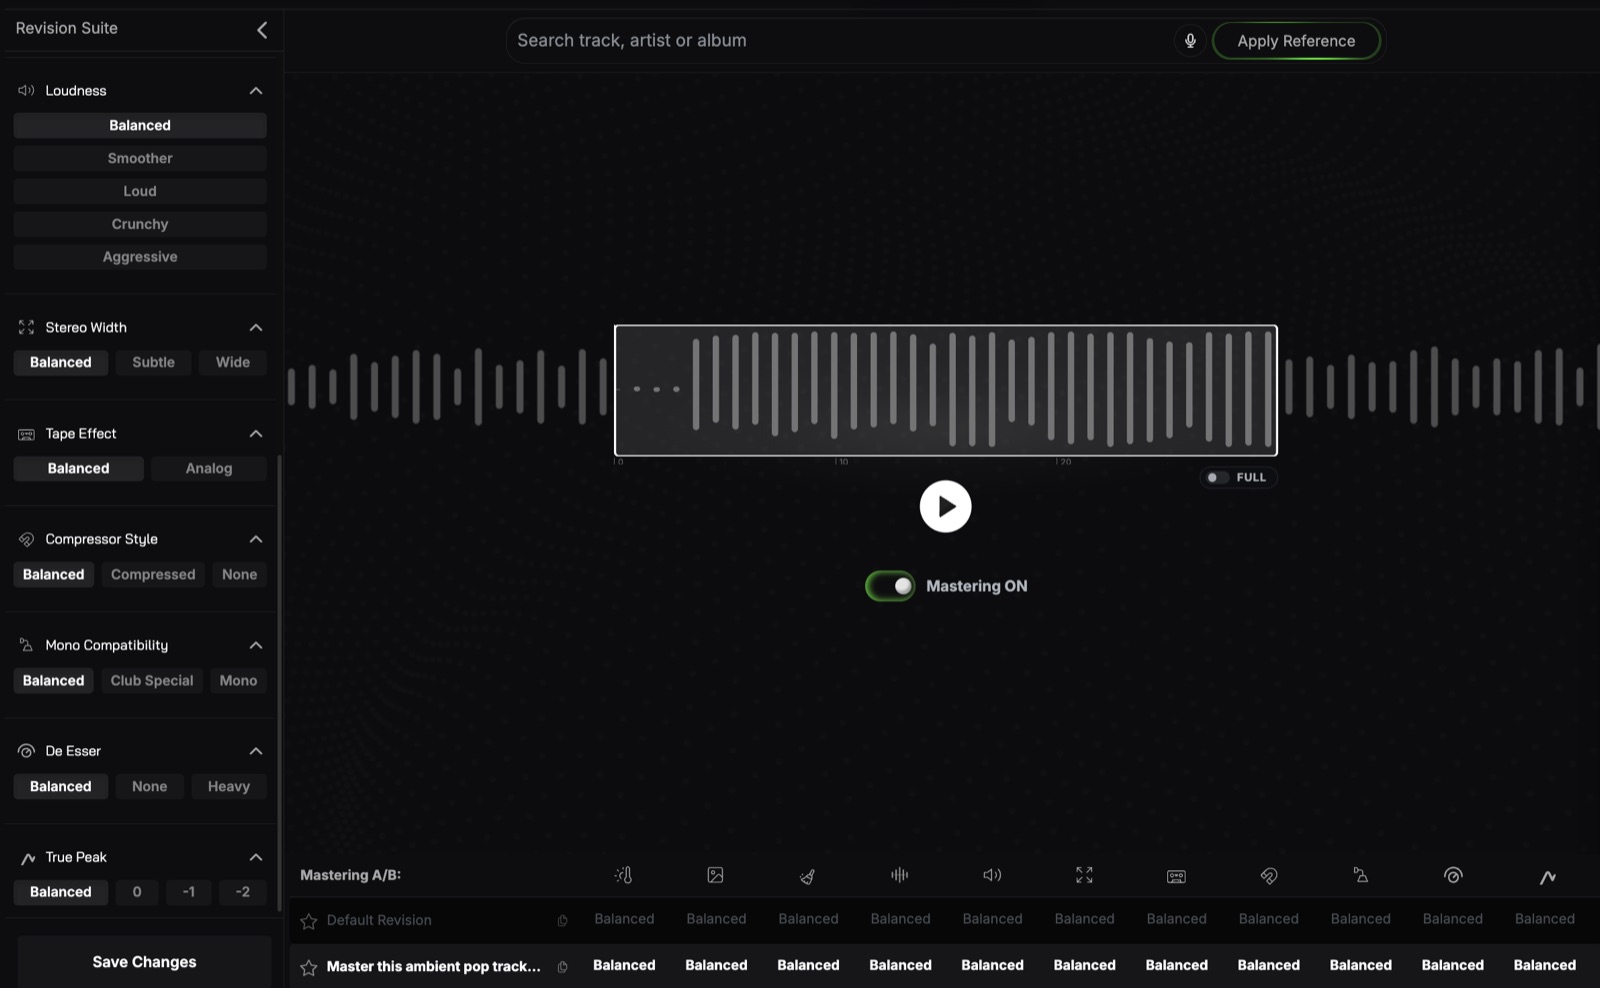
Custom EQ sits in the right panel. Switch it ON for 6 bands at 50, 90, 350, 2.5K, 7K and 10K Hz. Copy carries the curve to another revision.
Small moves: in my August session on an indie rock mix the sliders sat at -5 dB at 50 Hz and +3.5 dB at 90 Hz, and that already changed the low end a lot.
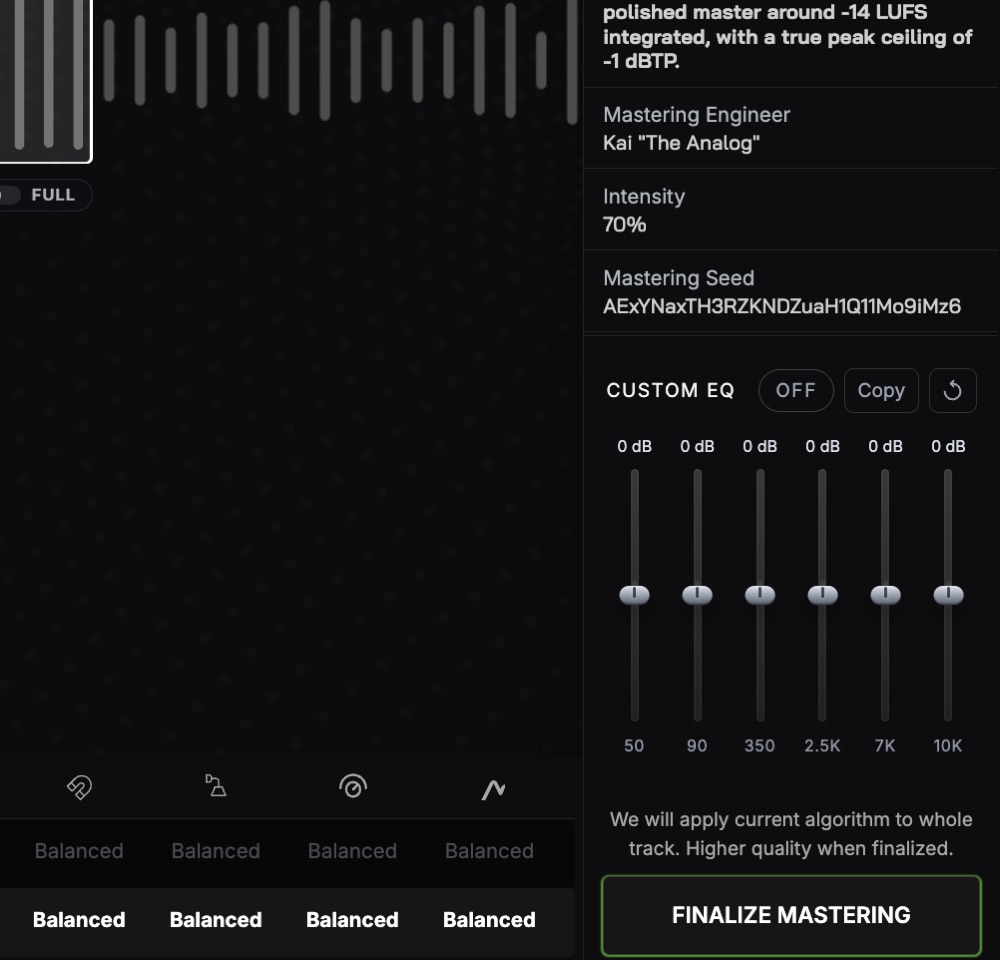
Toggle Mastering ON and off to A/B against the original. The FULL switch under the waveform plays the whole track instead of the 30-second window, on Plus.
Here is the whole loop on my own track, engineer picker through to the A/B. Put headphones on for this one, the point is the audio, not the screen.
Step 7: Remove or rebalance stems inside a SoundBoost master
Two paths. The short one: type “remove the vocals” or “drop the drums 2 dB and push the vocals forward” into the Prompt bar and Apply Prompt. The engine separates the stems, rebalances them and masters the result in 1 render.
The long one gives you faders. Open Stem Split Studio from the tabs on the Upload Track page, or run the track through the free stem splitter. Solo or mute stems, pull a fader, then click Send to Mastering at the bottom right.
The muted mix lands in a new mastering project.
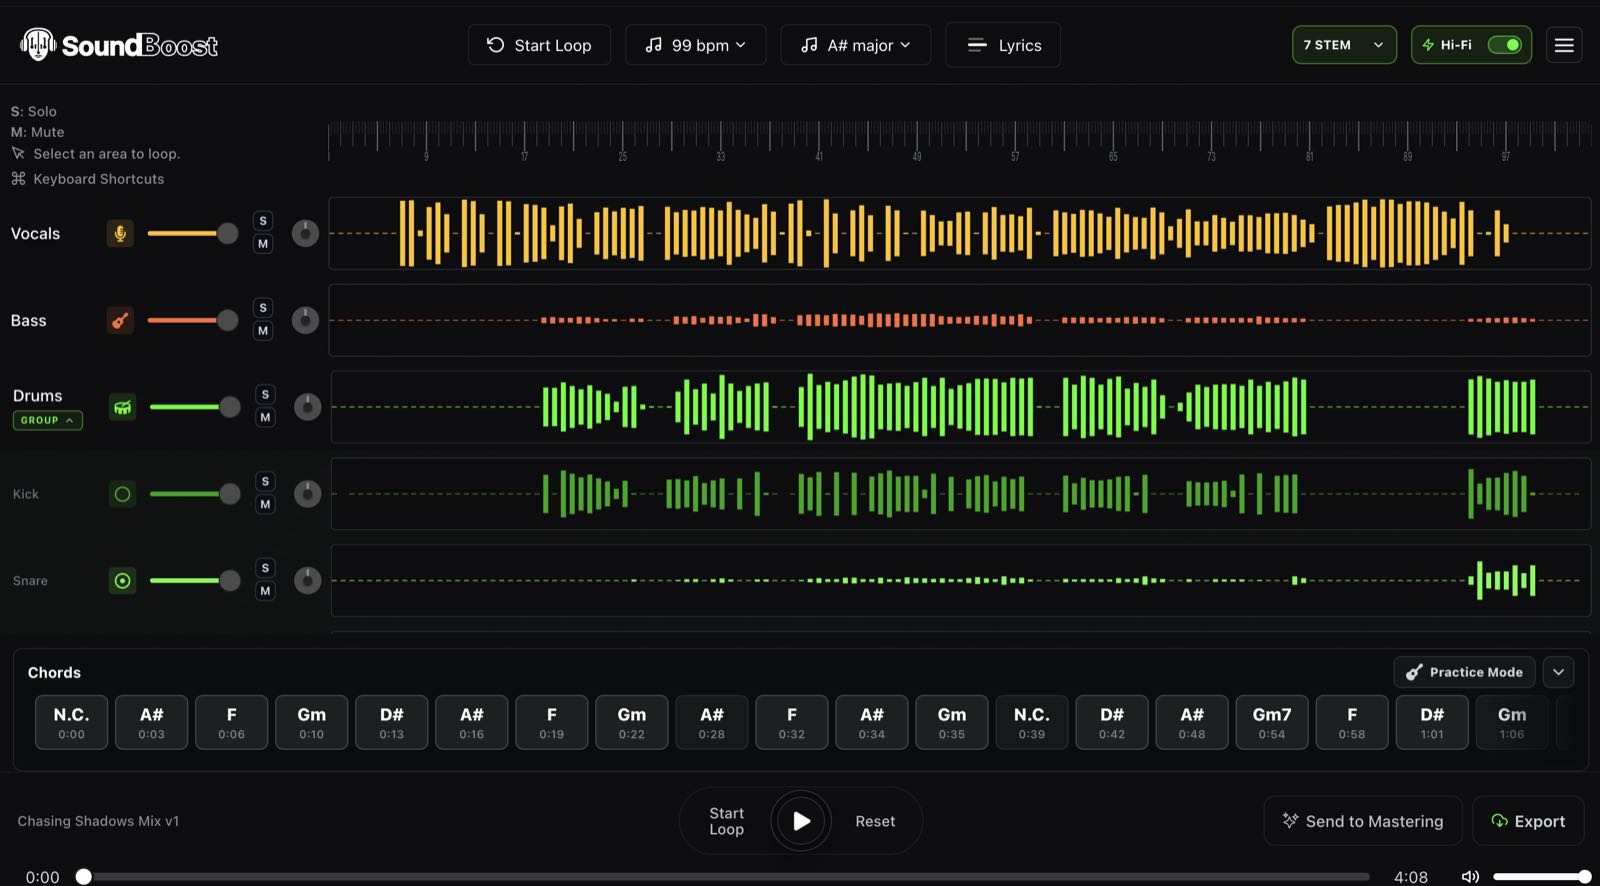
The Studio detected 99 bpm and A# major on my track and laid out the chords underneath. The 7-stem mode and the Hi-Fi model need a paid membership. How SoundBoost’s splitter compares to Moises and LALAL.AI is in my best AI stem splitters test.
Step 8: Finalize, measure and download the SoundBoost master
Click Finalize Mastering in the right panel. The preview you heard was the 30-second render; finalizing applies the chain to the whole track at higher quality. Download the WAV (up to 32-bit/48 kHz) or an MP3.
Then measure it:
- Drop the WAV into Youlean and play it through once.
- Note the integrated LUFS and the true peak.
- Compare to Spotify’s loudness page: playback at -14 LUFS, limiter at -1 dB.
A master that lands between -14 and -9 LUFS integrated with a true peak at -1 dBTP or lower is safe. Louder than that and Spotify turns it down, so you paid for loudness you never hear. Kai’s reply for my track said -1 dBTP, and the True Peak panel lets you force -2 if a platform asks for it.
Step 9: Bulk master an EP from one SoundBoost seed
Every finished master carries a Mastering Seed. Find it in the right-hand panel of the mastering page, below Mastering Engineer and Intensity. Mine read AExYNaxTH3RZKNDZuaH1Q11Mo9iMz6. Select the string and copy it.
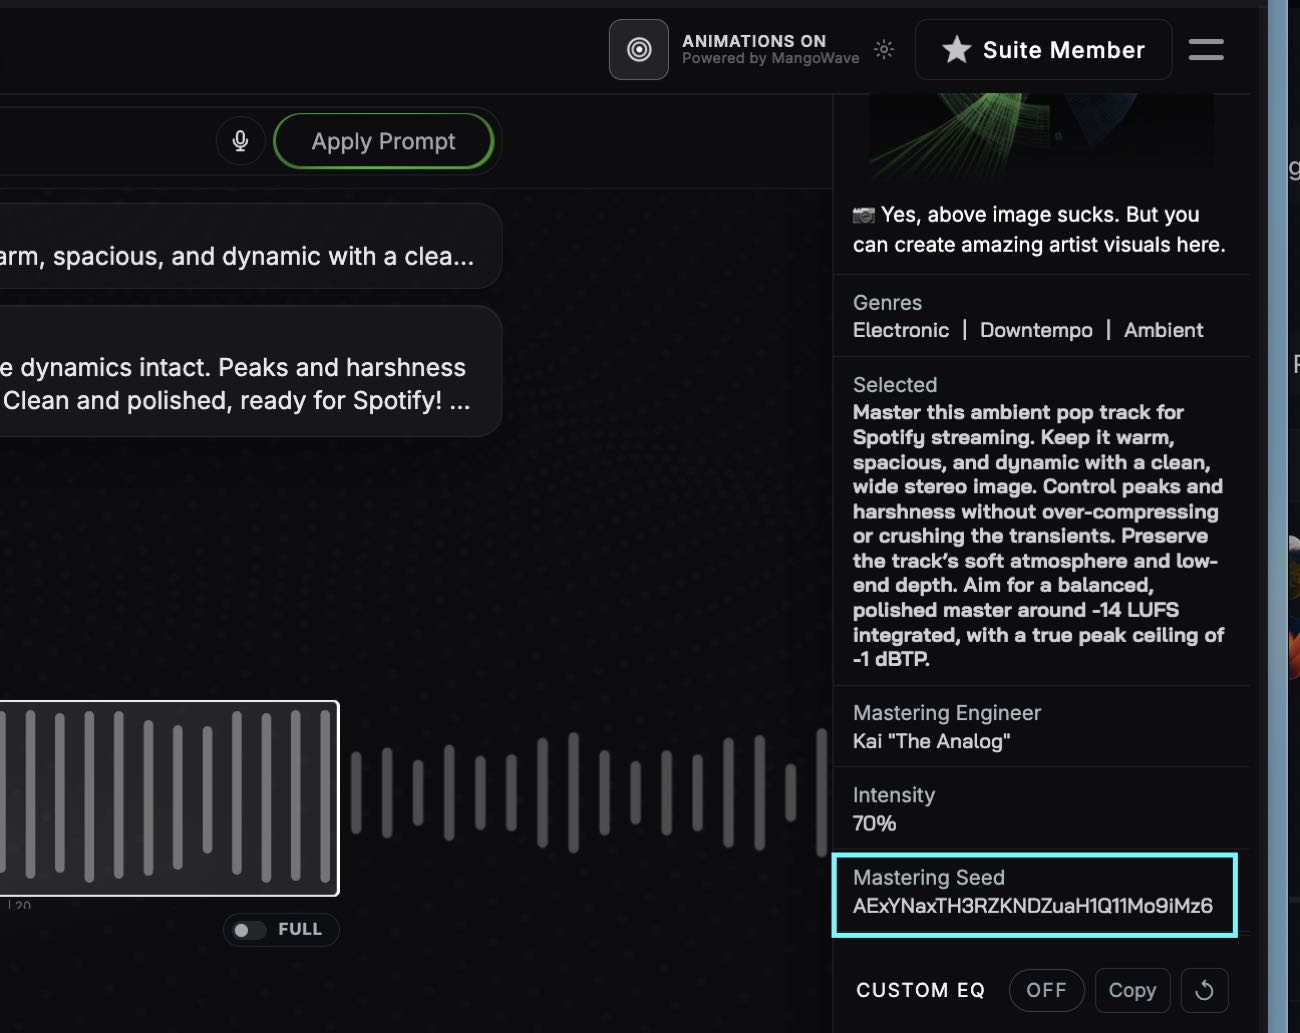
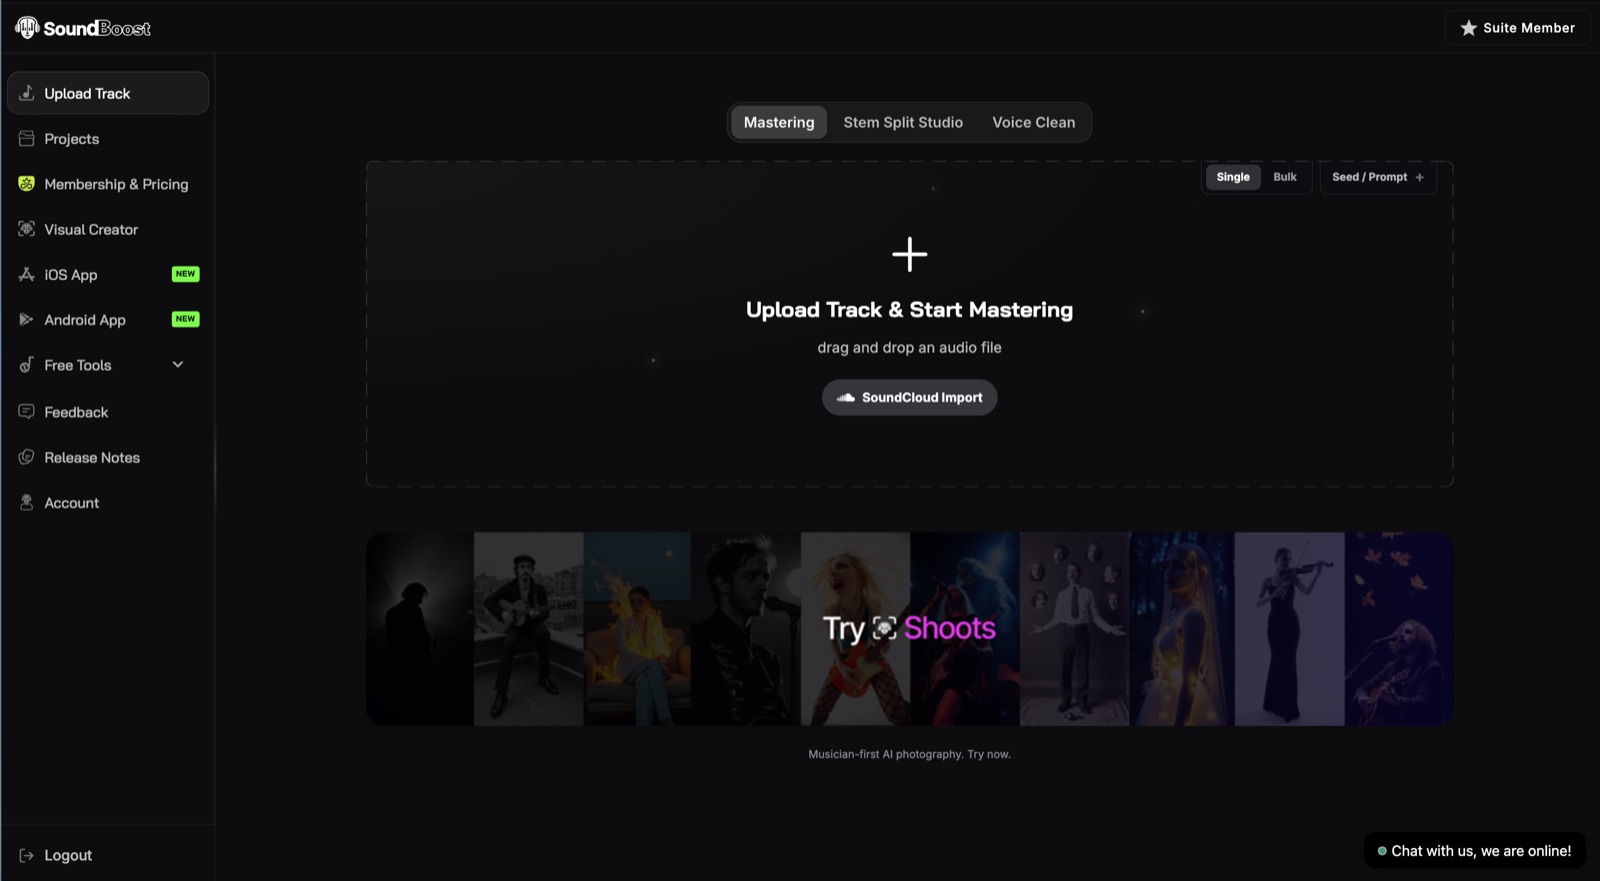
Now go back to Upload Track in the left menu. The Seed / Prompt button sits at the top right of the upload box, next to the Single and Bulk toggles.
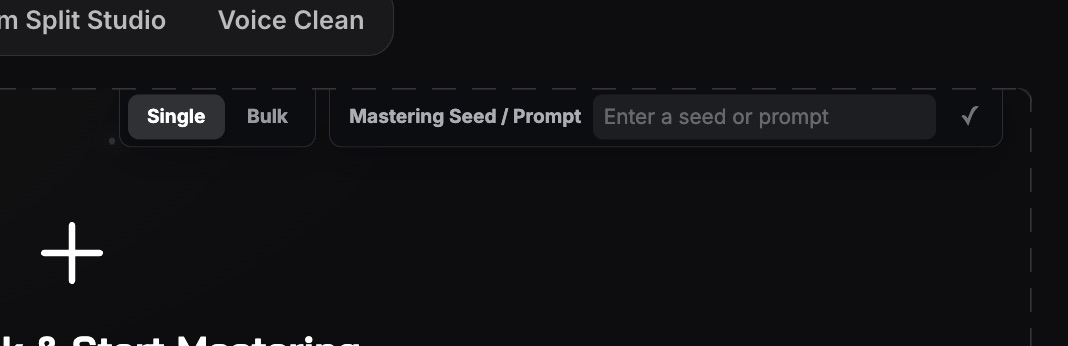
Click Seed / Prompt and a field opens that reads “Enter a seed or prompt”. Paste the seed, click the check mark, then upload the next track. Switch Single to Bulk first if you want to drop the whole EP in one go.
Each track then gets the same engineer and chain, and the engine sets each track’s loudness on its own.
Bulk mastering is an Unlimited Plus feature. I have not run a full EP through it yet, so treat the consistency claim as SoundBoost’s until I have measured 5 tracks in a row.
What common SoundBoost mastering mistakes trip people up, and how do you fix them?
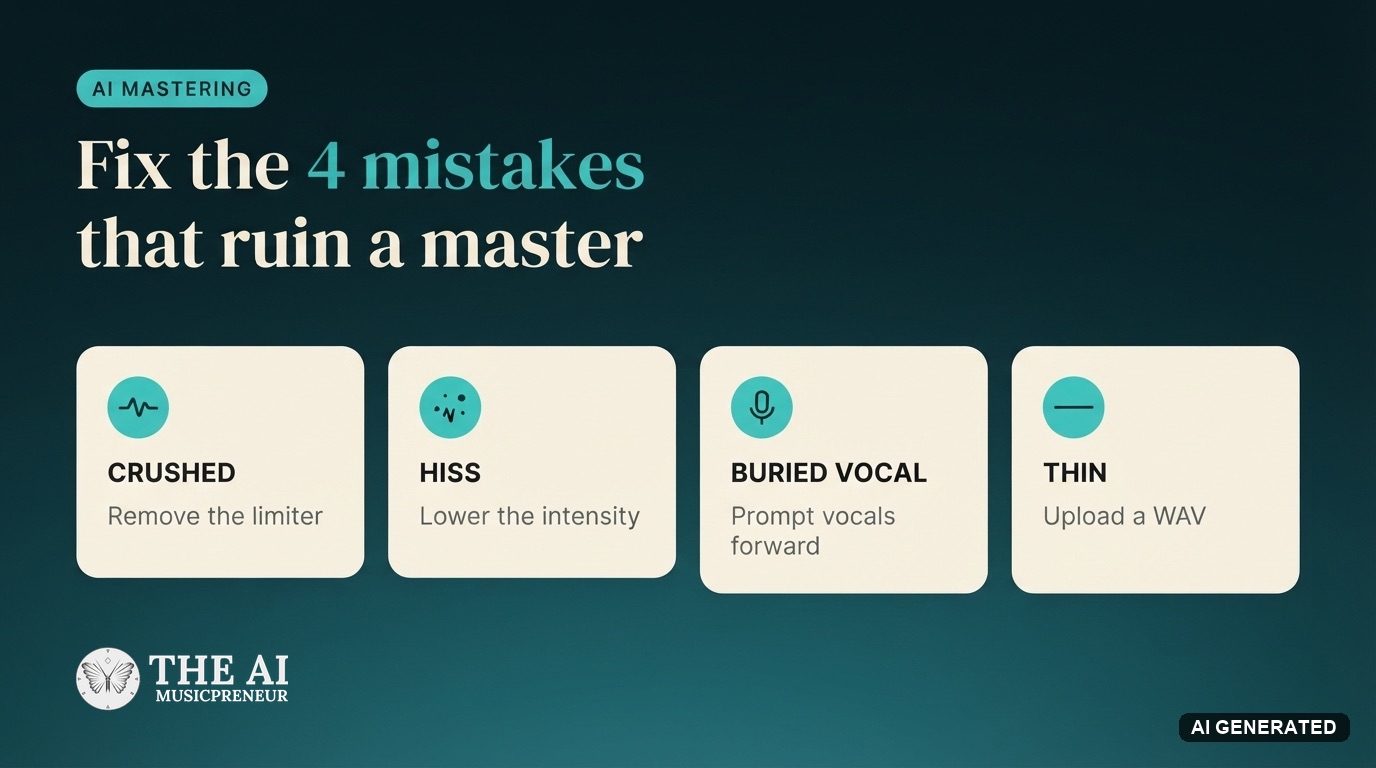
The symptoms that come up most often, with the fix for each:
- The master sounds crushed. The input already had a limiter. Remove it from the master bus, bounce again at -6 dBFS peaks, re-upload.
- Hiss got louder. AI exports from Suno carry top-end artifacts that a master lifts. Pick Luna or Sophia, keep intensity at 50 to 60%, or clean the vocal stem first in Step 7.
- The vocal sits behind the instruments. Prompt “vocals forward” or reference a vocal-led track. If neither works, the fix is in the mix.
- The chorus distorts while the verse sounds fine. The peak moment sat on the intro. Re-select it in the project and re-render.
- The download has a “hee hee” in it. You used the free export. Upgrade to Unlimited for the clean file.
- Everything sounds thin. You uploaded an MP3. Go back to a 24-bit WAV.
How do you get the best results out of SoundBoost?
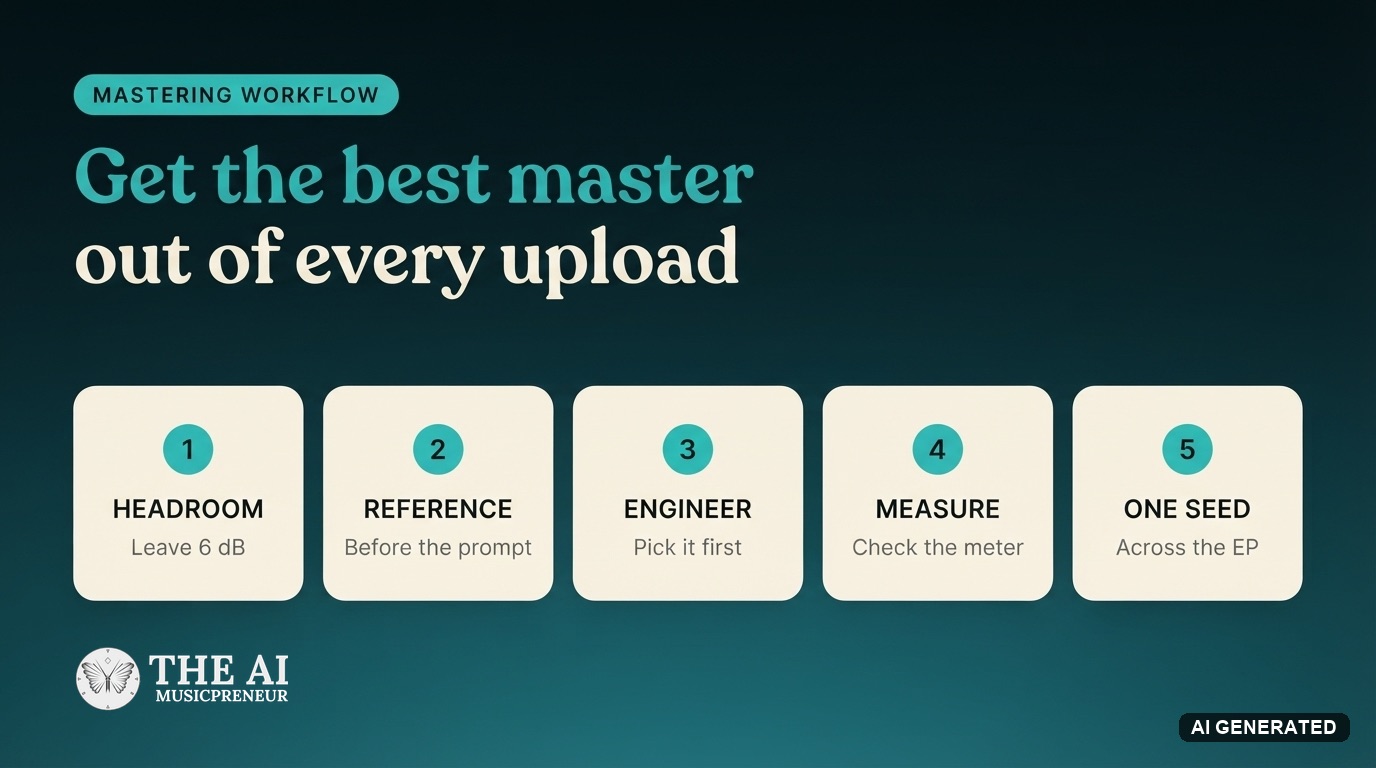
Ordered by impact:
- Leave 6 dB of headroom. Nothing downstream fixes a file that arrives limited.
- Reference before prompt, then 1 instruction per prompt.
- Pick the engineer before you type. Changing it later resets the character of every revision.
- Measure every export in a meter. The reply text tells you the target; the meter tells you the result.
- Keep the same engineer and seed across an EP.
Time savers: SoundCloud Import skips the download step, EQ Copy carries a curve between revisions, and the iOS and Android apps sync the same projects for a listen in the car. My August feature update covers what the apps do.
Is SoundBoost good enough to master a song for release?
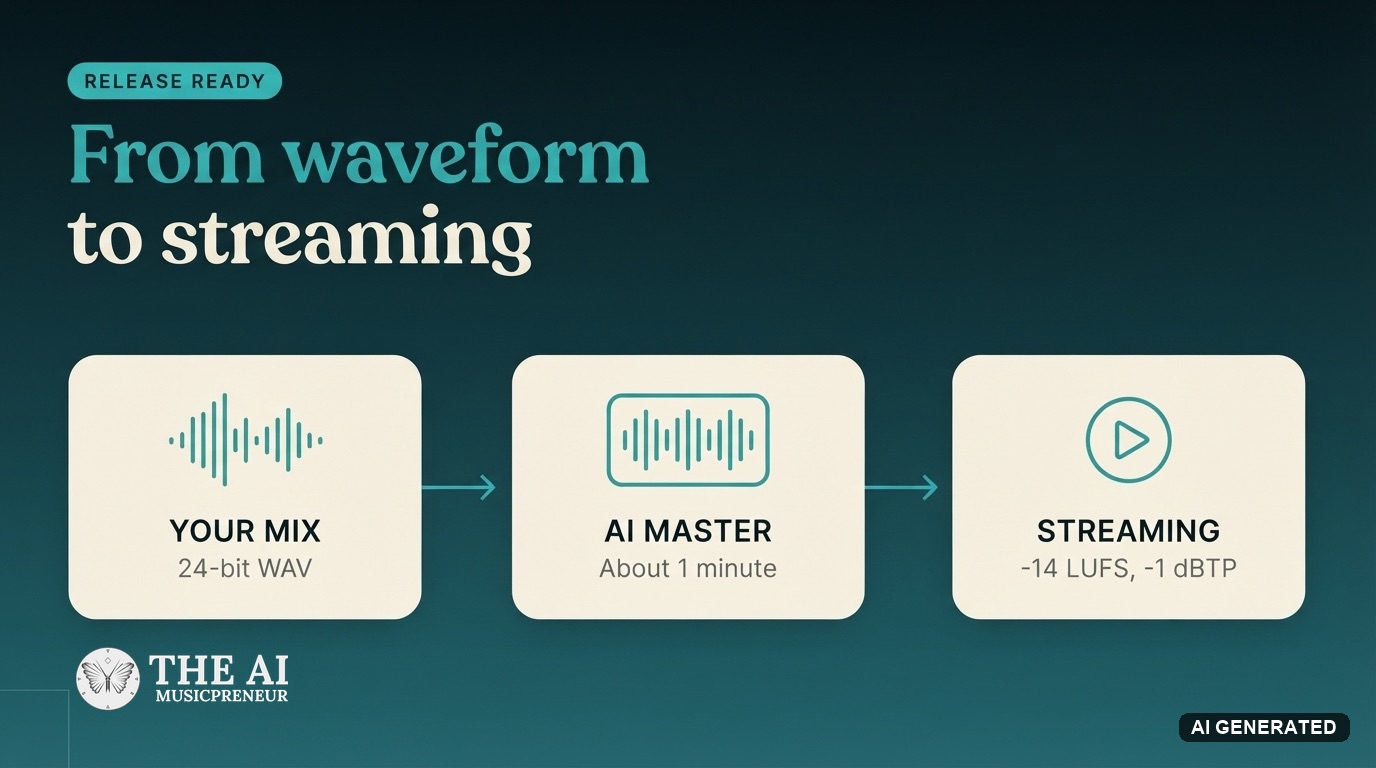
For a streaming release, yes. The chain is real, the true peak lands at -1 dBTP, and the stem-level prompt solves a class of problem no other audio mastering service handles in one pass. The limits are the 32-bit/48 kHz ceiling, no 96 kHz for vinyl or hi-res, and less precision than Ozone when you know exactly which frequency you want to cut.
My SoundBoost review holds the verdict, the pricing table and the buyer questions, and the text-prompt mastering launch is where I first wrote it up.
One loose end I could not close: the engine tagged my track Electronic, Downtempo and Ambient, and I still don’t know which of the 3 it mastered for. Probably a blend. Maybe it doesn’t matter.
Frequently asked questions
What does mastering a song actually do to the mix?
Mastering is the last pass on a finished stereo mix. It balances the tone with EQ, controls dynamics with compression, sets the loudness and stereo width, and caps the peaks with a limiter so the file plays cleanly on every speaker and streaming service. It cannot fix a bad mix, because it can only move the whole song at once.
How much headroom should a mix have before uploading to SoundBoost?
Leave 6 dB or more. Peaks around -6 to -10 dBFS with no limiter on the master bus give the engine room to set its own loudness and true peak. A mix that already hits 0 dBFS comes back crushed, because the mastering engine cannot undo a limiter you left on.
Which file format and bit depth should I upload to SoundBoost for online mastering?
Upload a 24-bit WAV at 44.1 kHz or higher. SoundBoost accepts MP3, WAV, AIFF, AAC, FLAC, ALAC, OGG and OPUS up to 1.5 GB, but its own FAQ says to avoid MP3 because the format has already thrown away detail the master cannot recover. Exports run up to 32-bit at 48 kHz, so there is no 96 kHz option for vinyl or hi-res.
How do I master a song from a Spotify reference link in SoundBoost?
Open the Reference tab beside Prompt, type the track, artist or album name, select the song from the list and click Apply Reference. SoundBoost matches the tonal balance, loudness and dynamic range of the reference. It does not copy the arrangement or the mix balance, so pick a reference in the same genre with a similar vocal level.
How does SoundBoost Voice Mode master a song from a spoken description?
Click the microphone in the Prompt bar and a Voice Mode panel opens with a Listening state. Speak the instruction and it transcribes into an editable box, so you read the text and correct any misheard word before anything renders. Click Apply Prompt or press Enter and the engine treats it exactly like a typed prompt.
Can SoundBoost remove drums or push vocals forward while mastering?
Yes. Since August 5, 2026 a mastering prompt takes stem-level requests, so 'remove the vocals' or 'drop the drums and push the vocals forward' runs the separation, the rebalance and the master in one render. The alternative path is Stem Split Studio, where you mute or fade individual stems and click Send to Mastering.
How long does it take to master a song with SoundBoost?
One render takes about 1 minute, per SoundBoost's own FAQ. Budget 5 to 10 minutes per track for the upload, 2 or 3 prompt revisions, a reference pass and the download. Bulk mastering on Unlimited Plus runs the remaining tracks of an EP from one seed without repeating those steps.
Can I master a Suno or Udio export with SoundBoost?
Yes. Export the WAV from Suno or Udio, upload it to SoundBoost and run the same steps. Suno exports usually land quiet, well below streaming level, with hiss in the top end that gets louder as soon as you raise the volume, so pick Luna or Sophia, keep the intensity below 70%, and use a stem-level prompt or the stem splitter to clean the vocal before mastering.
About the author

Covering AI music tools, industry shifts, and news for music creators and professionals. Twice-weekly newsletter at aimusicpreneur.com.
